Gallery

  • Emily de Molly

    No Love Lost
  • High Elbow

    Crummock Water
  • Dots!

  • Pocket Money Polishes - I Want Candy

  • Pocket Money Polishes Magic

    Gradient: Chanel Paradoxal and Dior Waterlily
  • Emily de Molly - Serenity

  • Fellrunning

    Dryburn Moor
  • Elevation Polish - Opal

  • Darling Diva Polish - Serendipity

  • Derwentwater

  • Pocket Money Polishes - Summertime

  • Nail Lacquer UK

    Eat My Cake
  • Scofflaw - Whiskey Tango Foxtrot

  • Hodge

  • Chanel - Taboo and Peridot

  • Chanel - Bel-Argus and Azure


Showing posts with label American Apparel. Show all posts

Wednesday, 12 March 2014

Jelly Sandwich with Quirk Peace Is Free


A sort of jelly sandwich today. The base is American Apparel Manilla, with a generous coat of Quirk Peace Is Free (lots of lovely glitters in this one). Then I decided I wanted to make the glitter a bit more 'matte' looking so I added a thin coat of Sally Hansen Complete Manicure in Polar Bare. Polar Bare is a sheer, jellyish white.

Polar Bare turned the mustardy yellow of Manilla into a more orange toned peach sort of a shade - not at all what I was expecting but I do like it! Finished with Seche Vite Quick Drying Topcoat.


I purchased Quirk Peace is Free from the Quirk website; the Sally Hansen and American Apparel polishes were a gift from a polish friend in the USA.

Sunday, 23 February 2014

New nail shape and some native american inspired stamping.......

MoYou Explorer Collection Plate 14
I filed my nails into baby stilettos! This happens every year about this time. Or at least for the last three years, I can't remember exact dates of nail shape changes before then, I just used to paint my nails a couple of times a week - there were no pictures, lol! I get bored with square nails, so I shape them pointy. Then I grow them long. Then I get bored with them, so I cut them short and square again. The last bit usually happens in the summer when I'm swimming outside a lot, and it takes ages to get into my wetsuit AND I start shredding it!


The mani is a base of American Apparel Cotton, stamped with Barry M Matte Nail Paint in Caramel. I used two different sections from MoYou Explorer Plate 14 for this part of the stamping.

MoYou Explorer Collection Plate 14


MoYou Explorer Collection Plate 14

MoYou Explorer Collection Plate 14

I wasn't specially concerned to get the two parts of the image equally spaced, since I was just going to stamp another pattern band over the blank bit. I did like how these pale neutral colours looked together though, so I thought it was worth taking a picture.

Then I added a black band from another part of the plate with American Apparel Hassid. I love how this mani turned out - I'm becoming increasingly fond of MoYou plates and my collection is growing steadily, lol. I'm a great fan of ethnic geometric patterns, so the explorer collection really hits my spot! And I like the whole pattern plates, they give such a variety of pattern possibilities.

MoYou Explorer Collection Plate 14

MoYou Explorer Collection Plate 14

MoYou Explorer Collection Plate 14

MoYou Explorer Collection Plate 14

Wednesday, 30 October 2013

Blue and Plum gradient.............. with flakies and dots


Here's a mani that evolved over a few days!

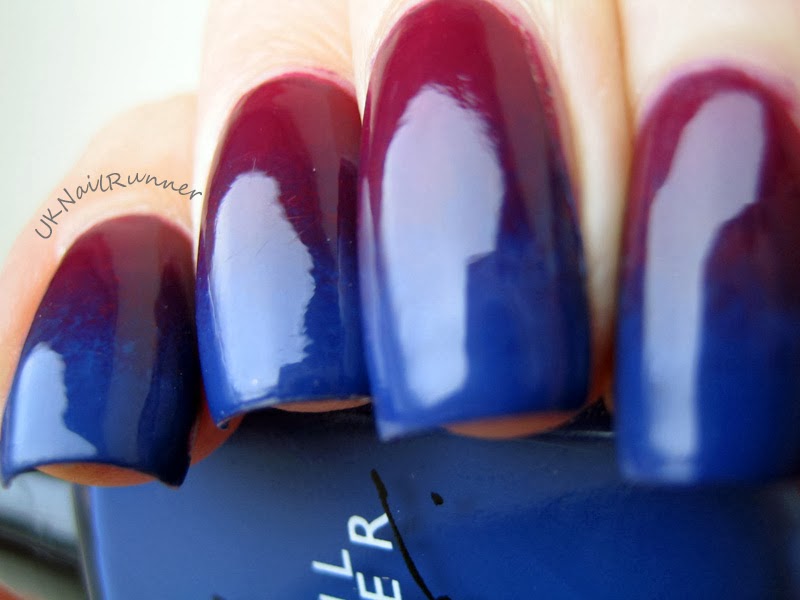
I started out with this gradient, which I did with American Apparel Berry and Mount Royal:


Then after a couple of days I added this iridescent flakie, M&S Limited Collection 'Light Mix', along with a few randomly placed large dots in Barry M Matte Polish in Vanilla.


I was surprised to see the 'Light Mix' polish in my local M&S a couple of weeks ago, and immediately grabbed  bottle, thinking how pretty and unusual it was. It really didn't disappoint, the flakies shimmer all shades of the rainbow and lie nice and flat to the nail. The range of colours reflected in this seems perfect as a topper for a gradient too.  And Barry M Vanilla is awesomely opaque for big dots too - this one seems to be as good as Barry M Lychee for nail art. Vanilla is a darker and cooler shade than Lychee, and leans more towards pinky grey. Here's a dotticure I did with Barry M Lychee recently. I'd consider these *very useful* shades in my nail art pallete - they're so opaque and easy to work with!


The American Apparel polishes were part of a gift from a friend earlier this year; I purchased M&S Limited Collection Light Mix from my local M&S and Barry M Matte Vanilla from my local Boots.

Thursday, 29 August 2013

Blue water marble with glitter (Pocket Money Polishes Keep The Faith)


Here's a manicure that evolved over a several days! I started out with plain, light blue nails - a sort of palate cleanser from all the glitter and nail art, lol! This is Zoya Blu - a really pretty light blue cream from Zoya's spring pastels collection earlier this year. I choose my colours by mood more than *season* as defined by the manufacturer!


Zoya Blu
Zoya Blu


Next day I added a water marble. I'm a relative beginner at water marbling, but I love the effect, so I've decided to try to a water marble every week to get more practice! In my last water marble I used just a single colour and clear polish to make a marbled pattern over a gradient, but this time I wanted to marble with several colours. I used Zoya Blu, Zoya Jacqueline, American Apparel Passport Blue and Rescue Beauty Lounge Cuprum.


It's not perfect of course, but I do like the way the patterns came out. RBL Cuprum worked in an interesting way, it spread really quickly and thinly over the water, and on the nail it looks a bit like a water colour wash.

My favourite nail was my middle finger on my left hand - here's a macro of that one. You can also see the coppery flecks in RBL Cuprum on the edge of my middle finger nail rather well in the macro. Although I like the fact that every nail turns out different in water marbling, I wish every nail came out as good as this. Obviously more practice is needed!


GLITTER, however, is great for covering imperfections! And because you can add it selectively, you can use it just to accent some areas of a nail art design:

Water marble with Pocket Money Polishes Keep The Faith


The glitter I used is Pocket Money Polishes Keep The Faith; this is a mix of slightly teal-ish blue glitters in hexes of various sizes, some tiny blue bar glitters and bigger pale gold holographic hexes. 


Pocket Money Polishes Keep The Faith
Pocket Money Polishes Keep The Faith 

I chose this glitter because the tone of blue matches up nicely with the blue shades in my water marble, and the pale gold hexes set off the warm cream of Zoya Jacqueline really well.

Water marble with Pocket Money Polishes Keep The Faith

Water marble with Pocket Money Polishes Keep The Faith
Water marble with Pocket Money Polishes Keep The Faith 

Zoya Blu and Jacqueline were part of a gift from a lovely polish friend, as was American Apparel Passport Blue. RBL Cuprum is a favourite from my stash - I got my bottle in a swap a while ago but the colour is still available to buy from the Rescue Beauty Lounge Website.

Charlie, the maker of Pocket Money Polishes, very kindly sent me Keep The Faith as a sample when I last ordered polish from her. Keep The Faith is one of the new Pocket Money Polishes colours for September, and goes on sale on 1st September at the Pockcet Money Polishes website, which includes a blog with information on new colours and release dates. You can also keep up with Charlie and her polishes on her facebook page


Tuesday, 27 August 2013

Dalmations and Dominoes! Pocket Money Polishes Forever, Angels and Schools Out

Pocket Money Polishes Forever and Angels
Today I have two of Charlie's new Pocket Money Polishes September Sparkle Collection glitter toppers to show you - *Forever* and *Angels*. Charlie describes these as a pair of yin and yang polishes; I love black and white glitter in just about any format and I think it's a great idea to present the black glitter and white glitter separately - it allows for much more creativity!

Let's start with Forever. Forever is a mix of small black hexes, big black circles and iridescent bar glitters. In the bottle in reminds me of frogspawn - all black glitters do, lol!

Pocket Money Polishes Forever
Forever would look great over just about any colour, as long as the background wasn't so dark it blended in to the black. I was feeling in a bit of a monochrome mood, and the black circles put me in mind of dalmations - so here are my 'dalmation nails'!

Pocket Money Polishes Forever

I'm not very keen on pure white polish apart from for stamping and other nail art - I think it looks rather stark; I much prefer a cream shade. I've used American Apparel Cotton here - this is a super cream shade. The formula tends a little to streakiness, but two coats and SV is fine for under glitter. I'd probably use three coats of AA Cotton on its own.  I used two thin coats of Forever over the base, then a coat of Gelous and a coat of Seche Vite. The iridescent glitters are interesting - over a light base they are yellow-pink, but over dark they flash green and blue, as you can see in the bottle shot above.

If you get the angle just right though, you see an occasional subtle flash of green from these iridescent glitters, even over a pale base.

Pocket Money Polishes Forever

Pocket Money Polishes Forever

Much as I love the monochrome style, I'm always looking out for ways to change and extend the life of my mani! So I decided to a splash of bright colour with another awesome glitter topper from Charlie  ~ *School's Out*. This is a mix of primary red, yellow and blue matt hexagon glitter.  
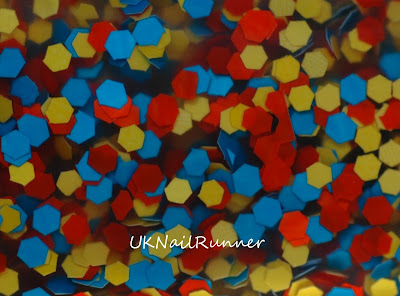
Pocket Money Polishes School's Out

Given that School's Out combines all three primary colours, it probably works best over a neutral base - I'd been planning to create some black and white nail art to wear this over......... and then I realised that I had that black and white nail art!  So here is a single, light coat of School's Out over Forever and the off-white base. I love this effect - very Mondrian colour scheme!

Pocket Money Polishes Forever and School's Out

Pocket Money Polishes Forever and School's Out

The other half of the black and white glitter pair is Angels, which is small white hexes, white circles and the same iridescent bar glitter.  But see how different the iridescent glitter looks in the bottle with the white.

Pocket Money Polishes Angels
Reverse the effect above, and put the white glitter topper over a black nail and you have dominoes! I used American Apparel Hassid as my base here - this black is a one coater (certainly if you're putting something else on top).

Pocket Money Polishes Angels

How different the iridescent glitters look against the black base!

Pocket Money Polishes Angels

Pocket Money Polishes Angels
And then with a light coat of School's Out:

Pocket Money Polishes Angels and School's Out

I think the combination of Angels and School's out over black is less striking than Forever and School's Out over cream - I'm not sure if it's the iridescent glitters flashing green and blue that makes the whole mani look more *busy*, or if it's just that multi-coloured glitter over black is a combination that I've worn many times before. I still like the effect, nonetheless.

Pocket Money Polishes Angels and School's Out
And, finally - well of course you can combine the Forever and Angels! Obviously if you put on one coat of Forever and then a coat of Angels you'd get a black and white glitter mix that would look great over just about any colour. But I wanted to do something a bit different - that you couldn't get from a bottle of black and white glitter (of which I have many, in all shapes and sizes).

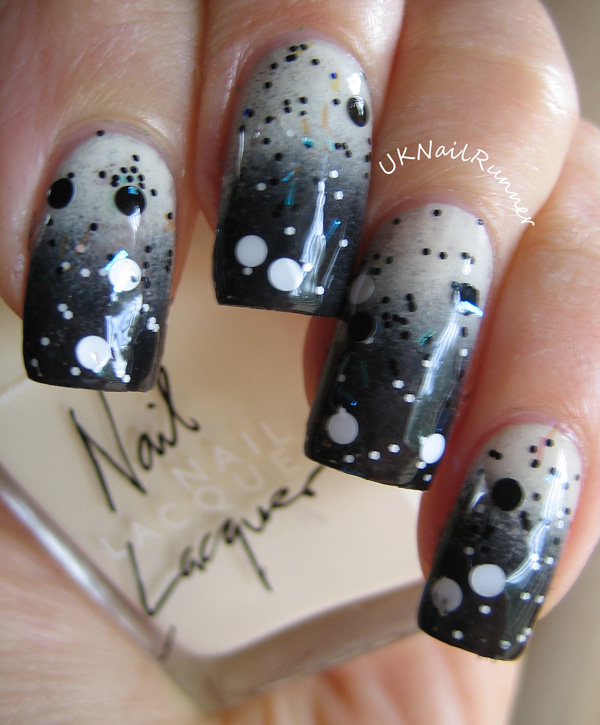
I've been working at improving my gradient technique for the last few weeks, and a challenge that I'd set myself was to do a black and white gradient........... so here it is; a perfect base for a black glitter and a white glitter!

Pocket Money Polishes Forever and Angels

Pocket Money Polishes Forever and Angels

This last picture shows a direct comparison of how the iridescent glitter in Forever and Angels looks on a dark and light background.
Pocket Money Polishes Forever and Angels

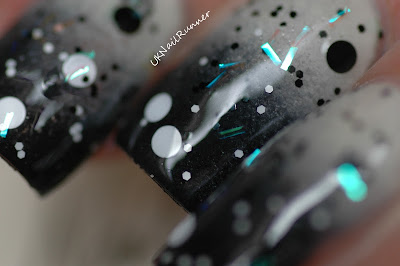
And finally, a macro of my gradient; I'm pleased with how that turned out! I painted my nails with American Apparel Cotton then applied a sponge gradient using American Apparel Cotton and Hassid. Although the black and white look scary together on the sponge, it actually worked quite easily. And for once I remembered to put tape around the edges of my nails, which made clean up a million times easier than it usually is when I do a gradient!

Pocket Money Polishes Forever and Angels

I purchased Pocket Money Polishes Forever, Angels and School's Out directly from Charlie at her website, which includes a blog with updates of restocks, launches and new colours. Forever and Angels go on sale on 1st September - I was lucky to be able to get a preview order :)  You can follow Charlie on facebook too. For anyone in the US who likes the look of Charlie's polishes, she is planning a US pop-up sale in September - details on this facebook page.

American Apparel Hassid and Cotton were part of a gift from a lovely US polish friend - American Apparel does have a UK website where you can buy the polishes but they seem rather pricey (£9) compared to the US rrp ($6).