Gallery

  • Emily de Molly

    No Love Lost
  • High Elbow

    Crummock Water
  • Dots!

  • Pocket Money Polishes - I Want Candy

  • Pocket Money Polishes Magic

    Gradient: Chanel Paradoxal and Dior Waterlily
  • Emily de Molly - Serenity

  • Fellrunning

    Dryburn Moor
  • Elevation Polish - Opal

  • Darling Diva Polish - Serendipity

  • Derwentwater

  • Pocket Money Polishes - Summertime

  • Nail Lacquer UK

    Eat My Cake
  • Scofflaw - Whiskey Tango Foxtrot

  • Hodge

  • Chanel - Taboo and Peridot

  • Chanel - Bel-Argus and Azure


Showing posts with label Layering. Show all posts

Sunday, 1 September 2013

Pocket Money Polishes Brown Eyed Girl


Pocket Money Polishes Brown Eyed Girl

Today I want to show you the last of my Pocket Money Polishes September colours. This is Brown Eyed Girl - a complex mix of brown, gold, copper and hot pink glitters with a sprinkle of holographic microglitter that holds everything together!

Pocket Money Polishes Brown Eyed Girl

Brown glitter is a real favourite of mine, and so is hot pink matt glitter, so this one presses all my buttons. I considered using a light pink base for this, but Char at SoYouBeauty has already done that (and it looks fantastic), so I decided I'd go for a more autumnal look effect with a pinky brown base. I used Rescue Beauty Lounge Bruised, which is somewhere between a brown and a plum depending on the light, and added a bit of simple water marbling with Pretty Serious The Pink One to accent the pink glitters in Brown Eyed Girl. Pretty Serious The Pink One is a stunning pink - click through to my post from a few weeks ago when I wore this on it's own to see just how bright it is!

Pocket Money Polishes Brown Eyed Girl


Pocket Money Polishes Brown Eyed Girl

Pocket Money Polishes Brown Eyed Girl

I wanted quite a heavy, glitter-bomb look for this mani, so I used two coats of Brown Eyed Girl. The glitter is perfectly suspended and applies smoothly and plentifully without any need for fishing or careful placement. The arrangement of glitter is just how it came out of the bottle. Because I'd put a lot of glitter on my nails, I used two coats of Gelous to make sure the mani is perfectly smooth and then a thick coat of Seche Vite to seal and dry.

Pocket Money Polishes Brown Eyed Girl

Pocket Money Polishes Brown Eyed Girl

Pocket Money Polishes Brown Eyed Girl


Brown Eyed Girl (and the other colours in the September Sparkle collection - which includes the black and white glitters Angels and Forever and the pretty blue Keep The Faith) go on sale at 6pm today at Pocket Money Polishes website. I was lucky to be able to buy a preview bottle of this last week. RBL Bruised is an old favourite from my stash (I got this in swap a while ago, if I remember correctly) and I purchased Pretty Serious The Pink One from Sally MagpiesLlarowe also stocks Pretty Serious polishes and ships internationally.

Tuesday, 27 August 2013

Dalmations and Dominoes! Pocket Money Polishes Forever, Angels and Schools Out

Pocket Money Polishes Forever and Angels
Today I have two of Charlie's new Pocket Money Polishes September Sparkle Collection glitter toppers to show you - *Forever* and *Angels*. Charlie describes these as a pair of yin and yang polishes; I love black and white glitter in just about any format and I think it's a great idea to present the black glitter and white glitter separately - it allows for much more creativity!

Let's start with Forever. Forever is a mix of small black hexes, big black circles and iridescent bar glitters. In the bottle in reminds me of frogspawn - all black glitters do, lol!

Pocket Money Polishes Forever
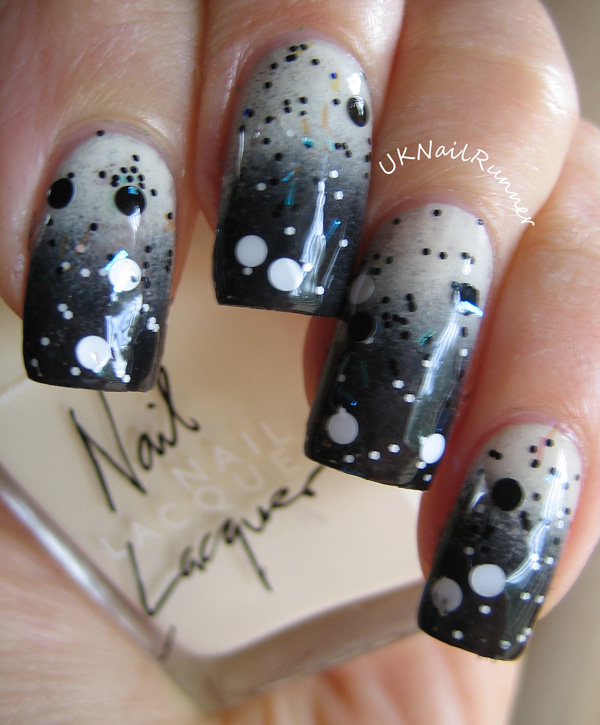
Forever would look great over just about any colour, as long as the background wasn't so dark it blended in to the black. I was feeling in a bit of a monochrome mood, and the black circles put me in mind of dalmations - so here are my 'dalmation nails'!

Pocket Money Polishes Forever

I'm not very keen on pure white polish apart from for stamping and other nail art - I think it looks rather stark; I much prefer a cream shade. I've used American Apparel Cotton here - this is a super cream shade. The formula tends a little to streakiness, but two coats and SV is fine for under glitter. I'd probably use three coats of AA Cotton on its own.  I used two thin coats of Forever over the base, then a coat of Gelous and a coat of Seche Vite. The iridescent glitters are interesting - over a light base they are yellow-pink, but over dark they flash green and blue, as you can see in the bottle shot above.

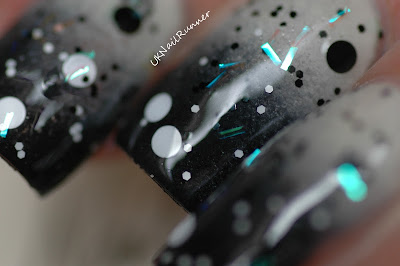
If you get the angle just right though, you see an occasional subtle flash of green from these iridescent glitters, even over a pale base.

Pocket Money Polishes Forever

Pocket Money Polishes Forever

Much as I love the monochrome style, I'm always looking out for ways to change and extend the life of my mani! So I decided to a splash of bright colour with another awesome glitter topper from Charlie  ~ *School's Out*. This is a mix of primary red, yellow and blue matt hexagon glitter.  
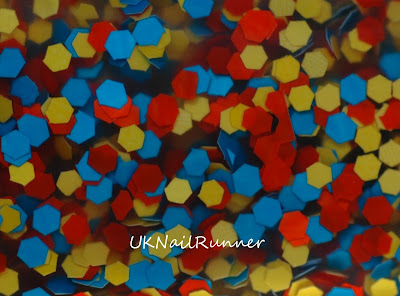
Pocket Money Polishes School's Out

Given that School's Out combines all three primary colours, it probably works best over a neutral base - I'd been planning to create some black and white nail art to wear this over......... and then I realised that I had that black and white nail art!  So here is a single, light coat of School's Out over Forever and the off-white base. I love this effect - very Mondrian colour scheme!

Pocket Money Polishes Forever and School's Out

Pocket Money Polishes Forever and School's Out

The other half of the black and white glitter pair is Angels, which is small white hexes, white circles and the same iridescent bar glitter.  But see how different the iridescent glitter looks in the bottle with the white.

Pocket Money Polishes Angels
Reverse the effect above, and put the white glitter topper over a black nail and you have dominoes! I used American Apparel Hassid as my base here - this black is a one coater (certainly if you're putting something else on top).

Pocket Money Polishes Angels

How different the iridescent glitters look against the black base!

Pocket Money Polishes Angels

Pocket Money Polishes Angels
And then with a light coat of School's Out:

Pocket Money Polishes Angels and School's Out

I think the combination of Angels and School's out over black is less striking than Forever and School's Out over cream - I'm not sure if it's the iridescent glitters flashing green and blue that makes the whole mani look more *busy*, or if it's just that multi-coloured glitter over black is a combination that I've worn many times before. I still like the effect, nonetheless.

Pocket Money Polishes Angels and School's Out
And, finally - well of course you can combine the Forever and Angels! Obviously if you put on one coat of Forever and then a coat of Angels you'd get a black and white glitter mix that would look great over just about any colour. But I wanted to do something a bit different - that you couldn't get from a bottle of black and white glitter (of which I have many, in all shapes and sizes).

I've been working at improving my gradient technique for the last few weeks, and a challenge that I'd set myself was to do a black and white gradient........... so here it is; a perfect base for a black glitter and a white glitter!

Pocket Money Polishes Forever and Angels

Pocket Money Polishes Forever and Angels

This last picture shows a direct comparison of how the iridescent glitter in Forever and Angels looks on a dark and light background.
Pocket Money Polishes Forever and Angels

And finally, a macro of my gradient; I'm pleased with how that turned out! I painted my nails with American Apparel Cotton then applied a sponge gradient using American Apparel Cotton and Hassid. Although the black and white look scary together on the sponge, it actually worked quite easily. And for once I remembered to put tape around the edges of my nails, which made clean up a million times easier than it usually is when I do a gradient!

Pocket Money Polishes Forever and Angels

I purchased Pocket Money Polishes Forever, Angels and School's Out directly from Charlie at her website, which includes a blog with updates of restocks, launches and new colours. Forever and Angels go on sale on 1st September - I was lucky to be able to get a preview order :)  You can follow Charlie on facebook too. For anyone in the US who likes the look of Charlie's polishes, she is planning a US pop-up sale in September - details on this facebook page.

American Apparel Hassid and Cotton were part of a gift from a lovely US polish friend - American Apparel does have a UK website where you can buy the polishes but they seem rather pricey (£9) compared to the US rrp ($6). 


Thursday, 1 August 2013

Pocket Money Polishes Summertime


 Pocket Money Polishes Summertime

This is the third (and last, for the moment at least) of my Pocket Money Polishes summer Glitter Babies. Summertime is very aptly named, it's a mix of yellow and lime green matt glitters with  few light blue hexes and hearts thrown in for good measure.  I've used this one for two different manis, but let's have a look at the glitter itself first:

Pocket Money Polishes Summertime

My first mani with Pocket Money Polishes Summertime was a sort of open jelly sandwich. I applied one coat of Summertime over Pretty Serious The Pink One, then I added a layer of Butter London Disco Biscuit and a final coat of Summertime. BL Disco Biscuit is a super bright pink jelly with strong blue shimmer / microglitter; the tiny sparkles you can see in the pictures here are in Disco Biscuit. Because it's so sheer, the lime and yellow glitters in Summertime show through very clearly, but are tinged orange. BL Disco Biscuit is a really versatile shade - I wore it a little while ago over a white based mani (Elevation Polish Opal) and it completely transformed that one!


Pocket Money Polishes Summertime

Pocket Money Polishes Summertime

I love the pink and green together; they are complementary colours so they set each other off perfectly.

Pocket Money Polishes Summertime

The alternative look I used Pocket Money Polish Summertime for was this all-green layering. My base here was Dior Lime, a lovely fresh spring green. I added two light coats of Summertime for this one.

Pocket Money Polishes Summertime

Pocket Money Polishes Summertime

Pocket Money Polishes Summertime

The colours in Summertime work perfectly with Dior Lime. I'll remember this mani for a long time......... these were my nails on Saturday when I ran the Lakeland 50 (50 mile off-road ultramarathon across the Lake District). I don't usually match my nails to to my clothes, but this was a perfect match for my Innovate Bare Grips, lol! Also a perfect choice for the hot sunny afternoon at the start of the event at Dalemain (north east corner of the Lake District) but not quite so apt at the end in Coniston (south west) at 3am after several hours of torrential rain! Still, it was a grand day out, I enjoyed it tremendously; miraculously suffered no injuries, not even a broken nail (there was a bit of rock scrambling to do in the last few miles so I'd pretty much resigned myself to broken nails).
Pocket Money Polishes Summertime

I bought Pocket Money Polishes from Charlie at her website here. I've been really impressed with the polishes I've tried so far (Pina Colada and I Want Candy) and Charlie is a real sweetie. Best of all, because Pocket Money Polishes is UK Indie brand, the polishes turn up in just a couple of days after ordering. She's just released some new colours today, which I'm really looking forward to getting :D


Friday, 19 July 2013

Pocket Money Polishes Pina Colada

Pocket Money Polishes Pina Colada
This is another wonderful matt glitter from Pocket Money Polishes. I wore I Want Candy recently; Pina Colada is a rather less dense glitter but is equally awesome in a different way!

I chose a contrasting base, a pale lilac-blue (Fashionista Dreamy). This is the complementary colour to yellow and orange glitters in Pina Colada, which is why the colours look good together! The picture above is in really bright sun, and the base does look this colour. Indoors, it's a more subtle rather greyish lavendery shade, and I think the glitter colours in Pina Colada look great in both cases.

I used just one coat of Pina Colada for this mani, as I deliberately wanted to keep the glitter looking sparse and well spaced out. If you wanted a dense glitter-bomb look, it would probably take a few coats to build up.

Pocket Money Polishes Pina Colada

Here is a macro shot of the glitters in Pina Colada

Pocket Money Polishes Pina Colada

and some more closer shots of the layering on my nails

Pocket Money Polishes Pina Colada

Pocket Money Polishes Pina Colada

Pocket Money Polishes Pina Colada

Here are a couple more bright sunlight pictures - although I love my current Pina Colada mani indoors I do like how the colours pop against the brighter background and I'm tempted to try this over a bright cornflowery blue like Illamasqua Cameo next time!

Pocket Money Polishes Pina Colada

Pocket Money Polishes Pina Colada

I purchased Pina Colada direct from Charlie, the maker of Pocket Money Polishes at her website. Pocket Money Polishes is a UK indie, which is great for us UK nailphiles. I have another lovely glitter from Charlie to share soon, and I'm really looking forward to the new colours she is working on for August :D

Fashionista is a Superdrug Brand; I purchased Dreamy at my local Superdrug. I'm not sure I'd recommend this polish, the formula was a bit thick and hard to handle and very strong smelling. I bought it a while ago purely on the basis of the colour.

Saturday, 13 July 2013

Emily de Molly Serenity

Emily de Molly Serenity
My first Emily de Molly! This is Serenity, a jelly polish in one of those aqua shades I can't resist, with bronzy-gold and holo teal glitter. The glitters are quite small and subtle, giving a very delicate effect.

Emily de Molly Serenity


Emily de Molly Serenity


Emily de Molly Serenity

This is two coats, with a base of Essie Turquoise & Caicos and Gelous and Seche Vite to smooth the whole lot out. Application and formula on Emily de Molly Serenity were excellent. With hindsight, Serenity probably didn't need to be layered over another colour, but I like to have something to wrap my tips with and something to get a nice crisp edge around my cuticles, neither of which I find very easy with glitter polishes.

Here's a bottle macro (not much polish here, mostly glitters stuck to the glass) and a couple of nail macros to show the glitters in a bit more detail:

Emily de Molly Serenity

Emily de Molly Serenity

Emily de Molly Serenity

Overall I'm very impressed with Serenity and I'm looking forward to trying more Emily de Molly shades if I'm lucky enough to get hold of any!

Emily de Molly Serenity

I purchased Emily de Molly Serenity from Sally Magpies; it's great to be able to buy indie polishes from a UK distributor - my order arrived the day after I placed it! I think these must have proved popular though, as there are only a few colours left now. Hopefully Sally will have a restock soon!