Gallery

  • Emily de Molly

    No Love Lost
  • High Elbow

    Crummock Water
  • Dots!

  • Pocket Money Polishes - I Want Candy

  • Pocket Money Polishes Magic

    Gradient: Chanel Paradoxal and Dior Waterlily
  • Emily de Molly - Serenity

  • Fellrunning

    Dryburn Moor
  • Elevation Polish - Opal

  • Darling Diva Polish - Serendipity

  • Derwentwater

  • Pocket Money Polishes - Summertime

  • Nail Lacquer UK

    Eat My Cake
  • Scofflaw - Whiskey Tango Foxtrot

  • Hodge

  • Chanel - Taboo and Peridot

  • Chanel - Bel-Argus and Azure


Tuesday, 5 March 2013

OPI Lights of Emerald City - Swatches #2

When I swatched Lights of Emerald City recently, I wore it over mid / dark base colours (my earlier post on this polish) but I've been intrigued how it would look over a pale base, especially what would happen to the smaller, iridescent glitters (which are the stars of the polish, in my opinion).

There are a few swatches around over pinks and nudes, and I love greens...........so here we go:

OPI LIghts of Emerald City
OPI Lights of Emerald City

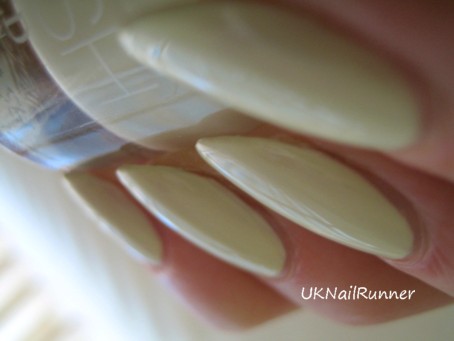
For my base I used M&S Limited Collection Polish in Mint - this is a green so pale it's hardly green at all. I'd describe it as the colour of apple flesh, rather than mint, but it's lovely all the same. It's a bit like a green- toned version of Illamasqua Load!

M&S Limited Collection Polish in Mint

M&S Limited Collection Polish in Mint


M&S Limited Collection Polish in Mint
M&S Limited Collection Polish in Mint 

This is three coats, with a coat of Seche Vite between the second and third coats to even out any streaking. I love pale creams, but a lot of them do tend to streak, so I always do this 'SV sandwich' as a precaution.

Then I added just one coat of OPI Lights of Emerald City

OPI LIghts of Emerald CityOPI LIghts of Emerald City

OPI LIghts of Emerald City
Depending on the light, the iridescent glitters show either red or blue - the blue wasn't happening over my darker bases at all. I rather like the delicate effects here!

And finally, just for a bit of fun, I thought I'd see how Lights of Emerald City works in a jelly sandwich. I've seen a couple of swatches of Lights of Emerald City in a sandwich with Glints of Glinda, a dirty pale tan jelly from the OPI Oz collection - but that colour is SO not me I can't really judge whether I like the effect or not! I chose to layer Zuma Beach from the American Apparel Sheer range over the combination above, and the effect is really interesting!

OPI LIghts of Emerald City
OPI LIghts of Emerald City with American Apparel Zuma Beach

The jelly smooths out the large white square glitters and somehow integrates them into the whole mani much better. You do lose a lot of the sparkle in the iridescent glitters, but not all of it.

So I'm concluding that OPI Lights of Emerald City is quite a versatile polish really!

I purchased M&S Limited Collection Polish in Mint from my local M&S, and OPI Lights of Emerald City from a seller on amazon.co.uk. The American Apparel sheer polish was a gift from a polish buddy in the USA.


Sunday, 3 March 2013

GOSH Early Green with Pahlish Marbles on Glass

GOSH Early Green was one of those colours that leapt off the shelf and shouted 'buy me'! I love greens of all sorts, but especially fresh, spring greens. Early Green is lighter and fresher than Rescue Beauty Lounge Abiquiu and more yellow than Illasmaqua Smash, which are two of my favourite greens in this part of the spectrum. I'm too lazy to do a comparison swatch right now, but MishMreow has a really helpful comparison of GOSH Early Green with Illamasqua Smash and Radium.

Although Early Green is awesome on its own, I really wanted an abstract, glittery mani today, so I decided I'd pair it with a fairly complex black glitter, Pahlish Marbles on Glass. Marbles on Glass has black glitters of various sizes in every shape I can think of (hexagonal, round, square and bar), and some tiny colour-shifting iridescent glitters which glint blue and green at certain angles. And just for an extra bit of fun, I fished out a few red matt glitter squares from another polish to add an extra highlight to some of my nails. The inspiration for these colours is my Madagascan Giant Day Gecko - he is about the same colour as GOSH Early Green and has random red markings (many pictures of giant day geckos!)

Here's the finished result; this blurry, kind of abstract picture shows how the iridescent glitters catch the light and really sparkle:

 GOSH Early Green with Pahlish Marbles on Glass
This is what it looks like most of the time:

 GOSH Early Green with Pahlish Marbles on Glass

 GOSH Early Green with Pahlish Marbles on Glass

 GOSH Early Green with Pahlish Marbles on Glass
 GOSH Early Green with Pahlish Marbles on Glass

This is two coats of Pahlish Marbles on Glass. The base of this polish is pretty thick, and the glitter is dense, so a dabbing sort of application is needed and after applying the glitter the surface of my nails was quite rough and lumpy. To apply the red highights, I just picked the glitters I wanted from the the stem of the polish  brush with a fine (cheap) nylon paintbrush and dabbed them onto my nails. Then two thick coats of Gelous and a coat of Seche Vite to smooth everything out.

GOSH Early Green is far too nice not to include pictures of it on its own before the glitter. This is the first GOSH polish I've used, and I was surprised by how nice the formula is. I was expecting this to be a streaky horror, but it was great at just two coats and Seche Vite!

GOSH Early Green

GOSH Early Green

GOSH Early Green

 GOSH Early Green
 GOSH Early Green 

And finally, just to put the colour in context, I'm holding a daffodil bud here - Spring is on the way :)

 GOSH Early Green
 GOSH Early Green 


I purchased GOSH Early Green from my local Superdrug yesterday - GOSH  polishes are currently half price (£2.49), but I didn't notice how long the offer was for. I purchased Pahlish Marbles on Glass directly from the maker at her etsy shop; I've had this colour for a while now and I think it may be discontinued.

Friday, 1 March 2013

Nails Inc Feathers - swatch and review

Nails Inc 'Feathers' range is a rather strange and intriguing little collection of polishes. They are a densely packed mix of tiny bar glitter, and I suppose the finished effect on the nail is intended to look like a bird's plumage....

There are four colours in the collection, my pick was Chester, a nice mix of aqua, peach and lemon - the other options in the range were Cornwall (blue and white, which I've reviewed here), Edinburgh (blue and peach) and York (peach and white). I preferred the complexity of the three colour mix.

Here's my finished mani
Nails Inc Feathers - Chester

Nails Inc Feathers - Chester


Nails Inc Feathers - Chester

Overall, I like the effect a lot more than I was expecting. I was aiming for dense coverage, rather than a light sprinkling of glitter (as I'm not terribly fond of bar glitter in principle) so I used three coats over a neutral base (Sally Hansen Complete Salon Manicure in Crinoline). I think the colours in Chester work well together, and the finished mani is quite smooth......... but that did take a bit of work! Here's a closer picture:

Nails Inc Feathers - Chester

Now let's talk about the application! I started with an existing neutral mani I'd been wearing for a day or so, and applied one coat of Feathers. As you can see in the pictures below, this stuff is very roughly textured! Another thing is that if you apply with normal brush strokes (from cuticle to nail tip), all the glitters end up pointing in the same direction, and, in my opinion anyway, that looks a bit odd. Easily fixed by varying the direction of the brushstrokes and a bit of dabbing to get a more random application.

Nails Inc Feathers - Chester

Nails Inc Feathers - Chester

I think it looks quite cute at this stage (it reminds me of multi-coloured sugar strands on an iced bun), and I don't think it would be a problem to smooth it out with a few layers of topcoat. Another possibility would be a jelly sandwich......... Today, though, I was interested in getting a dense effect with Feathers on its own. I was concerned that with this level of roughness, when I put on the next coat, all the glitters would pile up and I'd end up with a horrible clumpy mess. So I put another layer of basecoat over the first coat of Feathers and let it dry before adding the next coat. I used basecoat because the one I have to hand dries quite quickly, and I was a bit wary of shrinkage from Seche Vite at this stage. I did the same thing between the second and third coat of Feathers, then applied two coats of Gelous and a very thick coat of Seche Vite. If you look carefully at the close up picture you can see how the bar glitter has sort of  'suspended' in all the base and top coats - I think this effect is quite cool. Clean up consisted of removing a few 'tufts' around the edges of my nails and cuticles with a pair of tweezers after drying, and knocking back a couple of stray strands of glitter on the tips of my nails with a glass file. I'm not sure I'd wear this type of polish without a base - I'm far to fond of a precise edge around the cuticles so I always use a base and layer glitter over it.

So quite a bit of effort to apply, but an interesting and unusual effect. Including the base of Crinoline, the mani is about 14 coats, so my nails are really thick! They look almost like stick-on acrylics! I use a modified version of the foil method for removing a thick, glittery mani like this - maybe I'll do a short post about removal soon :)

Just for completeness, here is the base I started with - Sally Hansen Complete Salon Manicure in Crinoline. This is a super slighty cool-toned porcelain pink, all the better for the fact I picked it up by chance in Poundland! Three coats plus Seche Vite. It reminds me of a delicate, shiny, birds egg!

Sally Hansen Complete Salon Manicure Crinoline


Sally Hansen Complete Salon Manicure Crinoline

Sally Hansen Complete Salon Manicure Crinoline
Sally Hansen Complete Salon Manicure  in Crinoline

What do you think of the Feathers? Is it worth the effort?

I purchased my bottle of Nails Inc Feathers from the Nails Inc counter at a regional department store; it's available directly from Nails Inc at their website here Nails Inc Shop Feathers