Gallery

  • Emily de Molly

    No Love Lost
  • High Elbow

    Crummock Water
  • Dots!

  • Pocket Money Polishes - I Want Candy

  • Pocket Money Polishes Magic

    Gradient: Chanel Paradoxal and Dior Waterlily
  • Emily de Molly - Serenity

  • Fellrunning

    Dryburn Moor
  • Elevation Polish - Opal

  • Darling Diva Polish - Serendipity

  • Derwentwater

  • Pocket Money Polishes - Summertime

  • Nail Lacquer UK

    Eat My Cake
  • Scofflaw - Whiskey Tango Foxtrot

  • Hodge

  • Chanel - Taboo and Peridot

  • Chanel - Bel-Argus and Azure


Monday 30 December 2013

Skittles with Butter London Wellies & Illamasqua Faux Pas

Butter London Wellies with Illamasqua Faux Pas


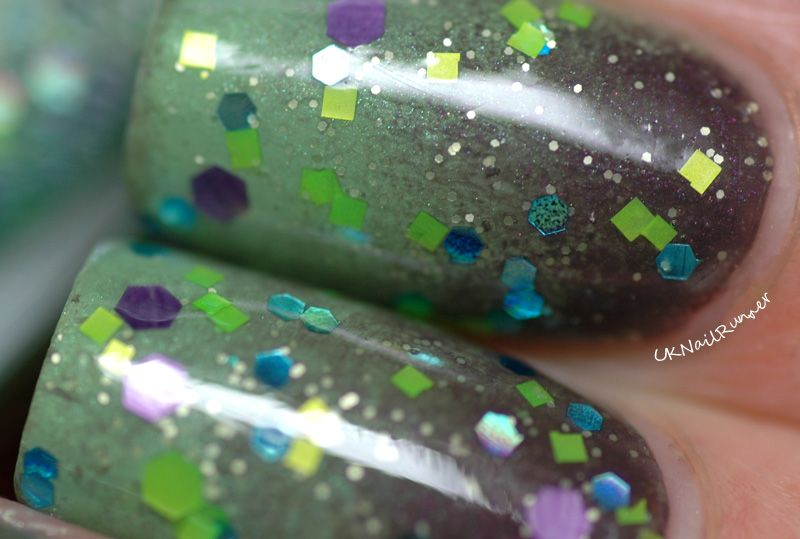
Here's a bit of bright jolly fun! Two of my favourite nail art techniques (dots and gradient) and one of my favourite colour combinations, lime and blurple!

The base is Butter London Wellies, a fabulous lime shade from their current autumn/winter collection. I remember seeing swatches of this back in the late summer, and thinking I absolutely must have the colour, then of course I've forgotten all about it. Months later, as is always the case in the UK (well maybe just outside of London, but certainly for me), it turned up in my local Boots............. and jumped straight off the shelf, into my basket and onto my nails the minute I got it home. Here it is - wonderful!!


Butter London Wellies


Butter London Wellies

Butter London Wellies


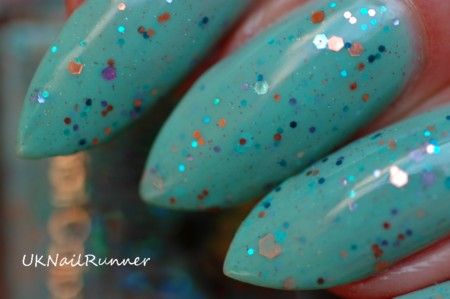
I'm going to call the colour *lime* because I can't decide whether it's a greeny-yellow or a yellowy-green. I'm fairly sure it's unique in my collection - it is more yellow than OPI Who The Shrek Are You, which is the nearest  I have I think. The formula is also massively better than OPI WTSAY - Wellies is a richly pigmented creamy polish. I was surprised how good it was - I love yellows but I have no expectations that they will anything other than a streaky mess to apply, irrespective of brand.

Butter London Wellies

Butter London Wellies


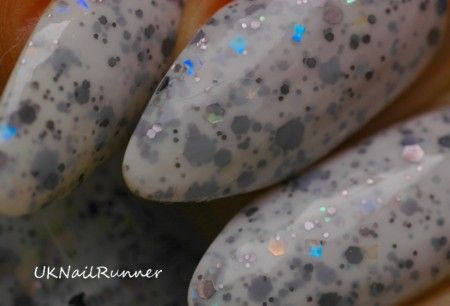
This is three coats with Seche Vite. I wore this for three days on its own before I added the nail art and it was still looking perfect.

So on to the skittles.............

Butter London Wellies with Illamasqua Faux Pas

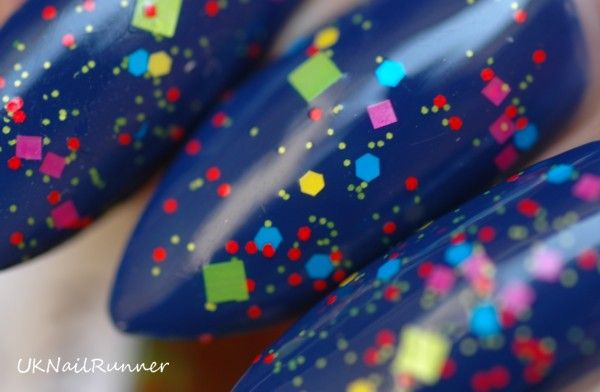
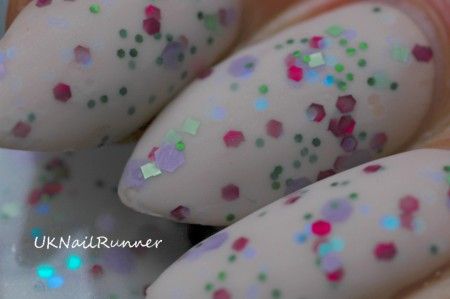
I'm not sure if these really are skittles, or if the mani is a 'skittlette' - maybe someone can tell me. Every nail IS different - but my index and middle fingers are a mirrored pair...and all the nails have the same two colours. Semantics, lol!

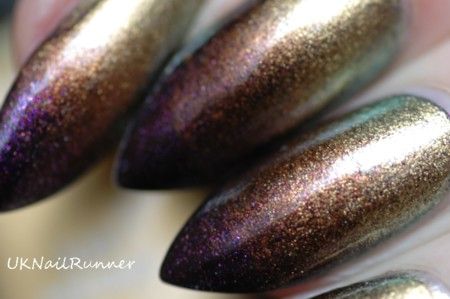
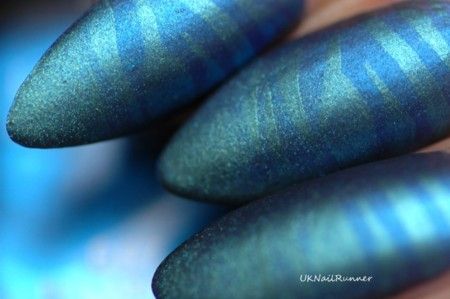
My contrast colour is Ilamasqua Faux Pas; I choose this particular purple because of its rubber texture, to contrast with the gloss on some of my nails.


Butter London Wellies with Illamasqua Faux Pas


For the index and middle fingers, I added a vertical gradient with Illa Faux Pas, dotted over it with Wellies and added topcoat.  Ring finger is dotted with Faux Pas but no topcoat. Little finger is gradient of Faux Pas, no topcoat, then big dots of Faux Pas (no topcoat again). I really like the way the rubbery finish on the Illamasqua works with the sponge gradient!


Butter London Wellies with Illamasqua Faux Pas


Butter London Wellies with Illamasqua Faux Pas

Butter London Wellies with Illamasqua Faux Pas

The ring and little fingers are the ones I like best! My thumb is just a reverse of my little finger, I added the gradient at the cuticle end and dots in BL Wellies.

Butter London Wellies with Illamasqua Faux Pas


Butter London Wellies with Illamasqua Faux Pas

I purchased Butter London Wellies at Boots. Illamasqua Faux Pas was a gift some time ago but it's still available at Illamsaqua's website (currently on sale for £5 in fact!).

Thursday 26 December 2013

Christmas Nails - OPI Glow Up Already

OPI Glow Up Already
OPI Glow Up Already
I chose an old favourite bling polish to wear over Christmas! This is OPI Glow Up Already, one of the Burlesque collection of glitters, which if I remember correctly were released for Christmas 2010.

OPI Glow Up Already

OPI Glow Up Already
OPI Glow Up Already

Glow Up Already is a mix of tiny glitters in light green, gold, orange, purple and blue. It sparkles like crazy under the lights and it's really beautiful - so festive. This is three coats with Seche Vite quick dry topcoat; no undies, and in real life it's pretty dense coverage. I've really enjoyed having this twinkling away on my nails the last couple of days :)


OPI Glow Up Already
OPI Glow Up Already

Monday 23 December 2013

Binky London - Swatch & Review 2 (including simple nail art ideas)................

Binky London Raffles Red with Richmond Red

I reviewed a few of the super colours from new UK brand Binky London recently (this post here); today it's time for my second instalment. Let's start with RED - because a) red is seasonal and b) I love red nails!

This first polish is Raffles Red, a classic red cream. It's a perfect pillarbox red, application was incredibly easy - this is just two coats. I mentioned the shape of Binky London polishes brush in my last review - the big rounded brush makes it really simple to get a perfect edge around your cuticles.

Binky London Raffles Red

Binky London Raffles Red

Another great thing about Raffles Red is the staying power of the pigment - reds are often very soft and sometimes go dull quickly (and even worse, some reds I've worn leave streaks of red all over paperwork, which can be embarassing) but that didn't happen at all with this one - it stayed rich and shiny for the whole life of my mani.

Binky London Raffles Red

The other red I have to show off is Richmond Red. This is a shimmery, almost *foil* kind of red, a bit bluer in tone than Raffles Red. To be honest, whilst Raffles Red is really my kind of colour, Richmond Red is on the edge of my comfort zone - I prefer creams to shimmers and orangey reds to bluey ones. However, once this was on my nails I absolutely loved it. Bonus for me is that I don't have a colour anything like this in my collection, so it's sure to get worn again!

First picture is in window light - sorry about all the reflections here but it does show the colour nicely:

Binky London Richmond Red

And then into the light box to calm down the crazy reflections:

Binky London Richmond Red

Binky London Richmond Red


I think this one needs a macro shot to show the full potential of the shimmer..........

Binky London Richmond Red


OK, so if when I can't choose which polish I want to wear, the only answer is to wear more than one! Here I've done a simple stamping using Richmond Red over Raffles Red. I love how the subtle tone-on-tone effect works with the two reds. I used one of the zebra images from the Cheeky Wild At Heart jumbo plate for stamping. I think this is classy enough to be work appropriate, especially at this time of year! Richmond Red stamps perfectly.

Binky London Raffles Red with Richmond Red


No topcoat over the stamping, I wanted to keep the texture of this mani!

Binky London Raffles Red with Richmond Red


This next mani is a combination of Chelsea Coral, a bright coral pink (it makes me think of flamingoes) and the glitter topper Fulham Frost. Of course, I could have just layered the glitter over a base colour, or done a gradient with it, but I wanted to try something a bit more original, so I used it for dots!


Binky London Chelsea Coral with Fulham Frost


The mani is two coats of Chelsea Coral, which gave full coverage, then dots of Fulham Frost applied once the base was dry. Dots are very easy to do - you need a dotting tool of some description... small ones made specifically for nail art can be bought very cheaply from online sellers on Amazon or Ebay, or you can improvise with household objects. Anything that is effectively ball shaped with some sort of handle will do - so old earrings, pen tops, paintbrush handles etc are all perfect! I pour a drop of polish into a old plastic milk bottle lid and dip whatever I'm using for the dots into it. Practice on a bit of paper if you're not sure how it will look!

Binky London Chelsea Coral with Fulham Frost

Binky London Chelsea Coral with Fulham Frost

Binky London Chelsea Coral with Fulham Frost

Glitter is great for big dots because you get this great gradation effect around the edges:

Binky London Chelsea Coral with Fulham Frost

Binky London Chelsea Coral with Fulham Frost


So my verdict on these polishes....... great staple colours and fantastic formula! I have a teal, another special effects topper and two metallic shades from this range to share soon!

My Binky London polishes are press samples provided for review but you can buy Binky London polishes online from escentual.com.

Sunday 22 December 2013

Iconic Effect Astral Plane

Iconic Effects Astral Plane
Iconic Effect Astral Plane 

This is my first Iconic Effect polish! Quite timely because the day it arrived, Iconic Effect was announced UK Indie Brand of the Year, and winner of the best UK Indie Polish (Extreme Holo Topcoat) so I was feeling a bit sheepish not having tried them yet. Especially since I won the UK Indie Mani of the Year with my Quirk Madame Thenardier mani (last mani in this post here)   :)

It's a super holographic duochrome in a bright purply-blue with a strong purple shift, a sort of coppery purple. Although I have a lot of pictures, at this time of year its hard to do a holo polish justice, but in artificial light, it is really holo - I'm looking forward to revisiting this one in the summer. Here it is in the best sunlight I had all day:

Iconic Effects Astral Plane


And in more subdued light, you can see the duochrome shift better...........

Iconic Effects Astral Plane

Iconic Effects Astral Plane


Popping it under my daylight lamp really shows off the holo, although this burns out the duochrome. This polish seems impossible to photograph showing off both the duochrome AND the holo at the same time!

Iconic Effects Astral Plane
Iconic Effect Astral Plane 

Macros are obligatory I think - starting with an abstract, fuzzy one; I love how the holo particles spread out into little pools of colour!

Iconic Effects Astral Plane
Iconic Effects Astral Plane 

These two are a bit more representative of what the polish looks like under my daylight lamp, with holo in full on bling mode! I could only take macros under the daylight lamp, the DSLR and macro lens need this much light.

Iconic Effects Astral Plane

Iconic Effects Astral Plane
Iconic Effect Astral Plane 
In terms of application, Iconic Effect Astral Plane is very straightforward. The polish is rather sheer, so I applied it over a dark blurple base (OPI Sapphire in the Snow) to make the duochrome and holo pop, as suggested in the swatches on Etsy. Next time I'll use it alone; I think that would give a softer look and it would maybe take a few coats to build up a good density of colour.

Actually, I bought two Iconic Effect polishes (to spread the cost of shipping, or is it so they don't get lonely in the post - I can't remember, lol); the other one I got was Northern Lights. Northern Lights is another holographic duochrome, blue-purple again but this time with more of a teal base. I think the shift is more coppery than Astral Plane.  I added a gradient of this polish over Astral Plane. The difference between the two is quite subtle but I like the finished effect!

Iconic Effects Astral Plane with Northern Lights gradient
Iconic Effect Astral Plane with Northern Lights gradient

Iconic Effects Astral Plane with Northern Lights gradient


Iconic Effects Astral Plane with Northern Lights gradient

Iconic Effects Astral Plane with Northern Lights gradient

Iconic Effects Astral Plane with Northern Lights gradient
Iconic Effect Astral Plane with Northern Lights gradient

Honestly, I'm not surprised how popular these polishes have been, they are superb! I purchased Iconic Effect Astral Plane and Northern Lights from the Iconic Effect Etsy shop.

Thursday 19 December 2013

Crowstoes Indian Summer (with ILNP Birefringence and some gold leaf!)

Crowstoes Indian Ocean with ILNP Birefringence and Gold Leaf

I love Duochromes! When I first saw Crowstoes Indian Summer on Ida's blog Ida Nails It, I just HAD to have it! Ida called it the motherofallpolish and I have to agree! It's magenta/red/purple duochrome and totally fantastic. I just used two coats without undies of any sort for this mani - I prefer the squishy, jelly sort of look. Ida did a comparison of Indian Summer *commando* and over black - check that out at the link above!

Application, as I'd expect from Crowstoes, was flawless. Lauri has been making polishes for a while now, and they are always superb. She has a fantastic eye for colour too.


Crowstoes Indian Ocean

Crowstoes Indian Ocean

Crowstoes Indian Ocean

In some artificial light, Indian Ocean looks like a red shimmer - but sadly I couldn't get a decent picture because when it was reddest the room was rather dark and my photos came out all fuzzy. Boo!

This macro I took in daylight really show the depth and complexity in Indian Ocean, you can see the magenta shift around the edges of my nails:

Crowstoes Indian Ocean


After a couple of days I decided I'd add a gradient with another super Indie duochrome, I Love Nail Polish (ILNP) Birefringence. Birefringence is a blue to purple duochrome, with an underlying shimmer very similar to Indian Ocean, so I thought I could combine the two in a gradient to make a super-duochrome...........

Crowstoes Indian Ocean with ILNP Birefringence

Crowstoes Indian Ocean with ILNP Birefringence

Crowstoes Indian Ocean with ILNP Birefringence

Crowstoes Indian Ocean with ILNP Birefringence

It's just a simple sponge gradient; I always use a slightly dampened sponge. I think this idea worked; I was well pleased with it anyway! Here's a shot in bright, direct sunlight to show the colour shifting pigments glowing RED!

Crowstoes Indian Ocean with ILNP Birefringence


My final addition to the mani was some real gold leaf. I don't own a gold leaf topper, but I do have a gold leaf..... it's very easy just to pull bits off and press them onto your nails. And the advantage of doing it like this is that you can get just as much or little gold onto your nails as you want, and pieces the size you want them, where you want them. Maybe I'm just a control freak but I had great fun adding the gold and I love how it turned out. Sort of *regal* with the gold and purples!

I topped this off with a layer of non-quick drying topcoat then Seche Vite to get a good gloss. I was a bit vary of adding SV onto what was effectively a four day old mani, I think it might have caused shrinkage.

Crowstoes Indian Ocean with ILNP Birefringence and Gold Leaf

Crowstoes Indian Ocean with ILNP Birefringence and Gold Leaf

Crowstoes Indian Ocean with ILNP Birefringence and Gold Leaf

Crowstoes Indian Ocean with ILNP Birefringence and Gold Leaf

I purchased Crowstoes Indian Ocean from Rainbow Connection UK - the polishes seem quite pricey but when you factor in the difference in shipping costs it works out about the same as buying indies direct from the US. And it's quicker and less risky with the mail. Internationally, the best place to get Crowstoes is Llarowe. ILNP Birefringence came to me via a friend but you can buy direct from the ILNP Etsy Shop. My gold leaf came from Waitrose but I guess you can find it in most supermarkets in the baking aisle!