
Nail Care
I consider myself very lucky in that I've always had strong nails that grow pretty fast without a lot of effort. I do think there are some things that I do, (and anyone can do) that help with this though:
1. Diet and general health
I eat a healthy diet with lots of protein, fat (yes, fat), fruit and vegetables and very low carbohydrate. Almost a paleo-diet. I also drink lots of water and tea. I probably drink too much coffee, but I don't drink alcohol. The way I eat is influenced by my foodie husband and my running - I want to be strong and light, and not hungry all the time. I'm also a bit intolerant of wheat, so it's easy to say no to carbs like bread and pasta. And I do a lot of exercise.
2. Moisturise - all the time!
My hands tend to dryness all the time, especially in the winter - it's cold where I live and I do spend quite a bit of time outdoors. Also, my circulation in my hands and feet isn't great; I suffer from Raynaud's syndrome and I'm prone to getting chilblains. So I've every motivation to moisturise and massage my hands and nail beds as much as possible!
I keep a tub or tube of hand cream (brands vary, I've listed a few of my favourites at the end of this section) on my desk and apply every couple of hours. I also specifically moisturise my cuticles with Burt's Bees Lemon Cuticle Butter at least twice a day. I spend quite a bit of time massaging this in - a few minutes on each nail - as this can help improve circulation in and around the nail bed, which has been linked to nail growth. I do this if I'm pondering over a specific work problem, or whilst I'm reading - I find it rather helps concentration! Also, it's useful to moisture under the free edge of the nail too. At night I use Lansinoh HPA Lanolin Nipple Cream or Lanolips 101 ointment (both of these are basically just pure lanolin) all over my cuticles and nails - this is a fantastic moisturiser but I find it too sticky to use during the day so I put it on before bed.
A great reference for all aspects of nail care is Loodie's blog - http://loodieloodieloodie.blogspot.com/
Some hand creams I like:
Lanolips Rose Balm Intense - Lanolin based cream which is not too greasy for use during the day, with a light rose scent. Lanolips 101 ointment is from the same range. These are Australian product but I bought mine in Waitrose - they are quite pricey but easy to get hold of.
Neutrogena Norwegian Formula Hand Cream - good basic hand cream, quickly absorbed. Readily available everywhere.
Waitrose Baby Bottom Butter - This is just olive oil, vanilla and chamomile oil whisked up into a buttery consistency. Great product, smells nice but can be a bit sticky - probably best at bedtime. I use this on my face and arms too.
Boots Botanics Daily Hand Therapy - absorbs really quickly and has a nice fresh smell. Sadly when I went to get a replacement tube recently I couldn't find this product - the whole Botanics range has been repackaged and seems rather different to what it once was. Sad all round - I liked the face and body products in this range too.
Isle of Mull Soap Company Hand and Body Cream - smell great and easily absorbed. There are a few fragrances; I'm currently using Lavender and Rose & Patchouli (bit naughty of me having two jars open at a time). These are handmade by a tiny company in Tobermory - if you're not on the Isle of Mull these products can be ordered here http://isleofmullsoap.co.uk/department/isle_of_mull_soap_tobermory_department_hand_and_body_cream/
Snowfire Ointment Stick - very old fashioned remedy for very dry skin- this is brilliant in the winter for chilblains and dry patches and also great for cuticles all year round. Made by Ransom in Bradford and sold in most chemists in the UK.
Nail Shape
This really is a matter of personal preference - and there are a a couple of factors you need to take into account when deciding what is the best shape for you:
- practical issues - if you do a lot of typing or manual work, very long nails might get in the way and be annoying. They are also going to be more vulnerable and prone to breaking, which again is annoying and frustrating.
- shape of your nail beds - at the cuticle your nail bed may tend towards round, square or triangular and some nail shapes suit a specific nail bed shape better than others. Have a look at Loodie's article on this http://loodieloodieloodie.blogspot.co.uk/2010/11/nail-shape-and-balance.html
- length of your nail beds - if your nail beds are long, then longer nails might look better. If your nail beds are not all the same length (mine aren't; I used to think this was odd but now I've seen an awful lot of pictures of nails I realise this is actually quite common) then a bit of extra length on some of them can help to even things out a bit.
The basic shapes are square, squoval (square with the corners rounded off a bit), oval, round, almond (oval but coming to more defined point - like an egg) and stiletto (a longer, pointier version of almond). This article beautylish article on nail shapes has diagrams and a description of each, apart from stiletto.
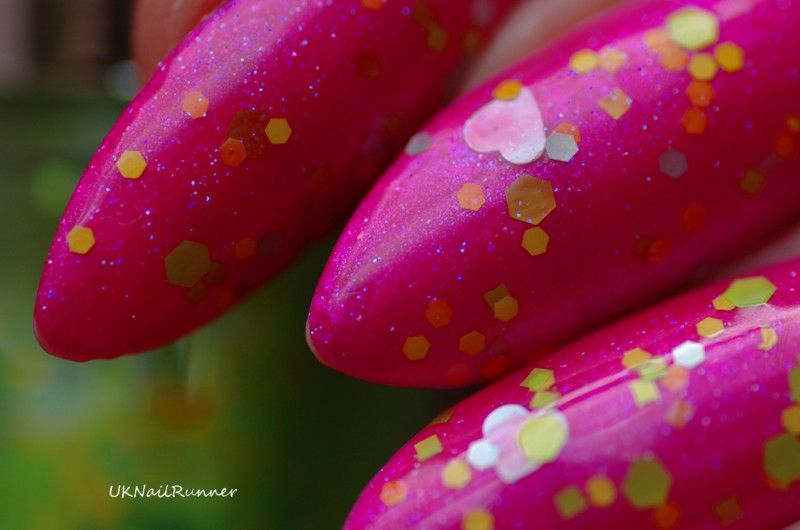
My own preference is for either square or stiletto nails, I don't really like any of the intermediate shapes and I enjoy making a bit of statement with my nails. My nail beds are rounded in shape, which makes it fairly easy for me to carry off any shape of nail. However, my nail beds are all different lengths, which is annoying. I can't wear my nails very short - and I really like short, square nails on others (I really wish I could wear my nails like Sammy at The Nailasuarus) - because as well as the beds being all different lengths they are quite long in proportion, so they just look silly. I get around the different nail bed lengths problem by varying the length of the free edge (the part that overhangs the end of the finger) on the nails - usually I keep the free edge longer on my middle and index fingers and my left thumb (yes, my nail beds are different lengths on my left and right thumbs!) so that the overall length of my nail (nail bed plus free edge) is the same on middle finger, ring finger and thumb and the index and little / pinky fingers are shorter, but in proportion.
This is really the shortest I can wear my nails as squares:
 |
| Alta Costura Vernis Squared over Essie Bobbing for Baubles |
This shape is quite practical and low maintenance, and looks good with just about any colour of polish. I find I'm generally more daring and experiment with bolder manis when my nails are this short.
A word on filing for square nails - I do it just straight across, one direction only. If I'm taking off a fair bit of length, I'll use an emery board, but if it's just to straighten off the square, I use a glass file. When my nails are square, I probably file (very lightly) twice a week to keep the shape precise. And I file whilst my nails are polished, preferably in a dark colour, so I can exactly what I'm doing.
This is more of my default square shape and length. I like to have some free edge on all my nails - I feel less like I'm cheating by varying the lengths this way!
 |
| OPI DS Glamour |
But as my nails get longer in a square shape, some problems arise:
- Curling corners
The corners on my index and middle fingers and thumbs start to curve under, making my nails look oval rather than square. This is so annoying! I used to think this was just me, or that I'd done something wrong with my nails, and if I filed or cut them shorter and started again it would be better next time. Of course it wasn't, every time they get to a certain length the corners curl. As I looked at more pictures of nails, and got involved in more discussions and debates, I realised that this is very common amongst those, like me, who have nail beds with a high c-curve rather than being flat. The c-curve is the cross-sectional shape of the nails looking from the end of your fingers.
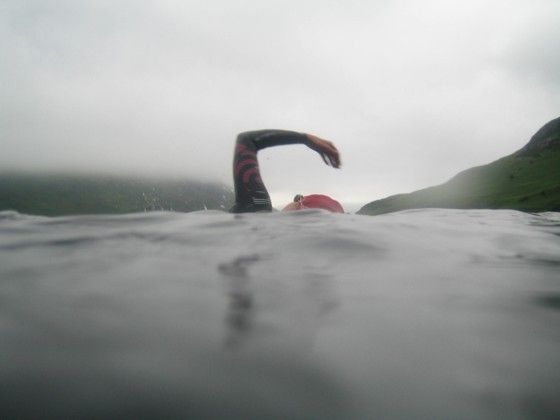
One thing I did notice about this curling, is that if my hands have been in water (shower or swimming) my nails flatten out. After an hour swimming, my nails look a perfect shape! So I moisturise my nails a lot, including under the free-edge, and this helps a lot. I also do a bit of shaping, as advised by Loodie in her post on nail shaping. One last thing I do as my nails get longer in a square shape is to run a tiny bit of nail glue under the free edge, after my hands have been in water and my nails are nice and flat and hydrated. As the glue dries it holds my nails in the 'good' shape and I've found this helps my nails to stay straight as they grow. The downside of this is that if you're not careful with the application of glue, and use too much, you end up with a sensation of having something under your nails.
- Clumsiness
Last Spring (2012) I shaped my nails from these long squares:
 |
| Butter London Marrow |
To these stilettos:
 |
| HARE Bisbee |
Although these look long, they were SUCH a relief after the squares. This shape is so much lighter - just look at the difference in area of nail. The squares above are really as long as I can practically manage nails that shape, but in the stiletto shape I can type perfectly well, plus they are quite useful for delicate botanical work! I can let them get quite a lot longer in this shape.............. to this length:
 |
| HARE Archipelago |
However, at this point they start to become impractical again, and after six months of long nails, I was ready for a change. The picture above was they day before I cut my nails in June 2012; the final straw was that once the open water swimming season started, I was really struggling to get into my wetsuit with these. I couldn't pull the wetsuit up properly without high risk of ripping it, and with my wetsuit not pulled up properly it filled up with water and spoilt my swimming. So off they came - easy come, easy go :)
Filing almond / stiletto shaped nails - again file in one direction only on any part of the nail to avoid breaking, weakening and peeling, but this time file from the corner to centre on one side, then from the corner to the centre on the other side, then gently round off the tip to the shape you want. Never saw backwards and forwards. And with this shape, it's essential (in my opinion) to have the nails painted when you file them so you don't make errors in the shaping. I find that I don't file as often when my nails are this shape as when they are square - with this shape my effort is focussed on making sure the almond shape starts at the edge of my nail bed as my nails grow, so I don't have 'grown-out' straight sided section between the edge of the nail bed and the start of the curve of the nail.
When I started writing this blog in February 2013, and my nails were short almonds. I let them grow into long stilettos until I got bored at this point in summer 2013 (Dior Lime post)

I usually cycle my nail shapes on about an annual basis - in 2013 I skipped the long squares though. Now it's January 2014 and I have medium squares....... I like this shape for nail art so I was planning on letting them get a few mm longer, then keeping them that kind of shape. Haven't decided yet whether I'll be seeing any pointy nails in 2014.
Breaks!
It happens sometimes, sadly. If it's a corner or on the free edge, I usually cut my losses and re-shape or shorten so they all match. I can deal with shorter nails much better than nails that are different shapes or lengths. But sometimes if the break is very low down the nail it is necessary to repair (and sometimes I just feel like prolonging the life of a longer nail for a bit, for some reason).
I use a method based on sticking the nail back together with glue whilst reinforcing it with a bit of teabag. This sounds ridiculous but it works really well! Addictedtoopi-yum wrote this excellent illustrated teabag repair method tutorial in her blog recently and I'm linking it here with her permission.
Just one thing I'd add to this - obviously a repaired nail will be at risk when you remove polish. If I have a repaired nail, I try to avoid glitterbomb manis that will need foil method removal - unless I'm planning to redo the repair as part of my next mani.
Polish application
Basecoat
As a general rule I always, always use a basecoat. It can help to prevent staining (although some colours, notably bright greens and teals, and some blues and bright pinks, all of which are among my favourites) will stain whatever you do) and it gives the polish a nice smooth surface to start with. Exceptions where I don't use a basecoat are the more finicky holos like Layla and China Glaze OMG collection. I've tried a couple of the new China Glaze Hologlam holos When Stars Collide and Infra Red and although I didn't use a base with these I found the application much easier than with the OMGs. Whilst on the subject of holos, I recently got hold of a bottle of Nfu-Oh Aquabase, which is meant to be the perfect base for difficult holographic polishes, but I'm not wildly impressed with it......... the holo I used it with only lasted for about a day.
I don't think which basecoat I use is anywhere near as critical as topcoat. My favourite basecoat always used to be Sally Hansen Nail Quencher, but that seems to have disappeared for good now. I've used Sally Hansen Maximum Growth Nail Treatment as a basecoat - I don't believe for a minute this makes my nails grow any faster but it dries really quickly to a super shiny finish so it works great as a basecoat. Currently I'm using M&S Autograph Quick Dry Basecoat; which I got as my freebie last time I was buying cosmetics when they had a 3 for 2 offer on. I was really surprised how good this is - it dries quick and smooth and has a nice fat oval brush that means I can cover all my nails with a single stroke. I think the most important thing about basecoat is to make sure it's dry before starting to apply polish.
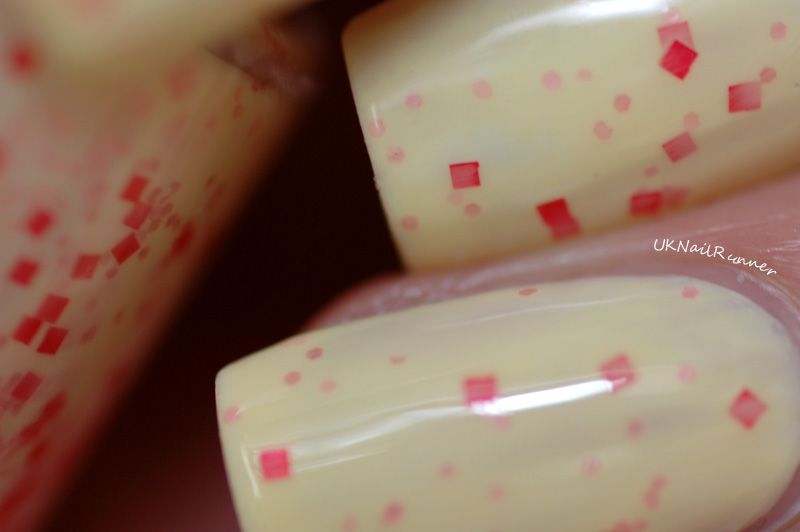
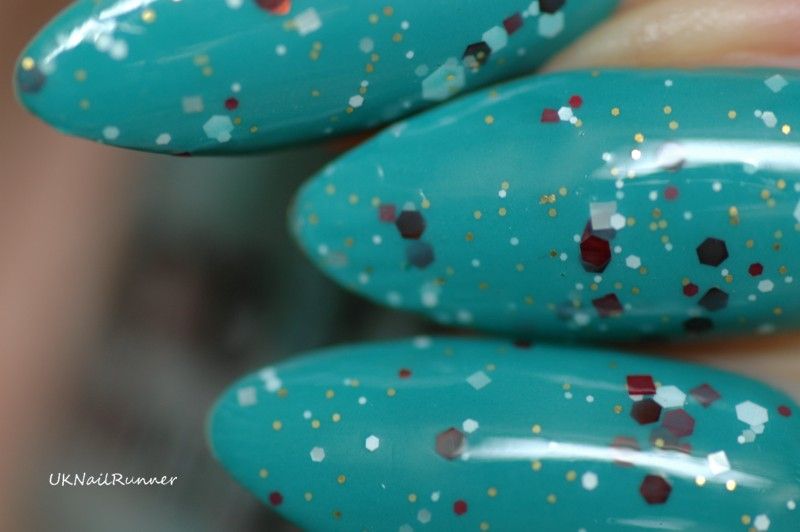
Polish
I almost always use three coats for even coverage. I prefer to use three thin coats rather than two thick. I'm right handed, so I paint my right hand first, and I start from my little finger and work towards my thumb, so I'm not working over the fingers I've just painted. By painting my right hand first, I don't have to use my left, non-dominant hand to paint my right hand when the nails on my left hand are covered in wet polish. That would be asking for trouble!
I paint in three strokes - get a blob of polish on the brush, put it on my nail in the middle, a couple of mm from my cuticle, then push it down towards the cuticle and quickly stroke it the whole length of the nail to the tip. Then a stroke on each side to fill in the gaps. Once I've done the first coat like this on one hand, I go back and 'wrap my tips'. This means painting the edge of the nail. It minimises any shrinkage that sometimes happens with quick drying topcoats, can reduce chipping, and in my opinion, makes the mani look neat and professional. Just put a bit of polish on the brush, hold the brush at right angles to your nail and run it around the edge. The action depends on the shape of the nail - for a square nail it's just a case of drawing the brush across the edge, for an oval or almond shape trace the curve of the nail with the brush.
If the polish is sheer, or a pale cream formula, I apply a layer of topcoat between the second and third coats. I find this smooths out any tendency to streakiness.
Topcoat
I always use Seche Vite quick drying topcoat (SV). I've tried other topcoats, but none compare for me. A shiny finish really makes the mani for me, and, used carefully, this stuff is magic. Some complain about shrinkage, but I think this usually happens when the SV is getting low in the bottle and starting to get goopy because it's exposed to air in the bottle. I recommend getting the professional size bottle of SV (which comes with a normal size bottle as well) and Seche Restore, which is a thinner. When I've used the little bottle down to about three-quarters full, I squirt in a few drops of Restore and fill the bottle up from the big bottle. So I always keep my working bottle almost full and a nice runny consistency. A professional size bottle lasts me about a year, and I do my nails probably four or five times a week.
To apply SV, don't let your polish get too dry. I apply SV as soon as I've finished applying polish. For it to look good, you need to be generous. Get a big blob on the brush, and apply from the base of the nail towards the tip. If you don't have enough to cover the whole nail, get some more on the brush - don't try to spread it thinly, it'll end up with streaky marks in and could well shrink.
Glitter smoothers
Worth mentioning because, much as a love glitter, it does make your nails lumpy if you're not careful! I always use an extra coat or two of a thick topcoat before I put on the Seche Vite to smooth things out. My holy grail smoother has always been American Classics Gelous - it didn't used to be that easy to get in the UK so I used to get friends in US to send me a few bottles every now and again. I believe Sallys UK stock it now. However, I've got a new favourite glitter smoother, Nail Pattern Boldness Glitter Tamer. A friend sent me a bottle of this as part of a gift and I really like it - better than Gelous in fact. The difference is that it seems to keep my nails flatter when they are long squares whereas Gelous, if I need to use more than one coat, always tends to encourage the corners to curve. I think this must have something to do with the chemistry of the products, maybe Gelous contains more solvents. Nail Pattern Boldness Glitter Food is available from Llarowe; I'll need to order new supplies soon!
Clean up
This is really important to me. Once I'd discovered the Megan Chair Clean Up Method and Seche Vite I took a whole new level of pride in how may nails looked. Neat crisp edges, with a small gap around the cuticles, and a high gloss finish are what I aim for. Opinions on 'the gap' vary - I like it, I paint a small gap and then perfect it with my clean-up brush.
Just read the tutorial in the link, there's nothing I can add to it! My personal preference for a brush is a small, straight edged angled brush I bought from Boots to use with my MAC Fluidlines - turned out it was hopeless for the eyeliner but perfect for nail clean up. But the brush of choice is very much a personal thing. And about the acetone, if you're in the UK, most chemists sell it but you might have to ask. I buy a 100ml bottle and it lasts about a year! You only use a tiny bit.
Your nails look fab! I love collecting lots of different brands and samples, I recently got a free nail varnish from Bodyshop, think its still running, got the freebie from fabfreesamples.co.uk/free-body-shop-nail-varnish/ its really nice, probably my fav now!
ReplyDelete