Gallery

  • Emily de Molly

    No Love Lost
  • High Elbow

    Crummock Water
  • Dots!

  • Pocket Money Polishes - I Want Candy

  • Pocket Money Polishes Magic

    Gradient: Chanel Paradoxal and Dior Waterlily
  • Emily de Molly - Serenity

  • Fellrunning

    Dryburn Moor
  • Elevation Polish - Opal

  • Darling Diva Polish - Serendipity

  • Derwentwater

  • Pocket Money Polishes - Summertime

  • Nail Lacquer UK

    Eat My Cake
  • Scofflaw - Whiskey Tango Foxtrot

  • Hodge

  • Chanel - Taboo and Peridot

  • Chanel - Bel-Argus and Azure


Showing posts with label Textured Effect. Show all posts

Tuesday, 29 July 2014

MoYou Nails product review


This is a bit of a first-ever for me... stamping designs that don't cover the whole nail! I was asked if I'd like to review a few products from the MoYou Nails collection, including one of their stamping polishes of my choice, and I jumped at the opportunity, since my default white stamping polish (Sally Hansen InstaDri in Whirlwind White) is almost used up and I'm not sure where I'd find another bottle!

I received MoYou Special Stamping polish in White, MoYou Stamper and plastic scraper and image plates 105 and 106 to try out. 106 is a set of french tips. I've been intrigued by these for years, but a little scared, and I've had a few unsuccessful attempts with tip images that came with other sets of plates. So a little nervous to try this out, I selected this floral image.... 


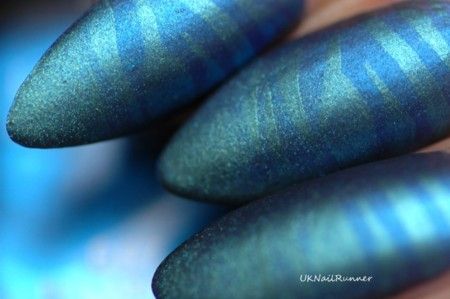
This was rather easy to place - maybe because of my current nail shape and I loved the effect! The base mani is Rescue Beauty Lounge Dead Calm, an old shade that is my favourite navy blue ever. 


I found the white stamping polish dense and opaque, without being thick at all - so it spread perfectly over the plate and was easily removed by the plastic scraper. The stamper I was sent was a *bit* squishy; I've not had great success with full-on-squishy stampers I've tried, and always end up going back to my old Konad stamper, which is really too small for my nails. But this one works great and I'm really happy with it. I roughed up the surface a bit with an emery board before I started, but I found the stamper picked up the image perfectly from the plate and transferred it very easily to my nails. My nails are not the easiest to stamp on, because I have quite a high c-curve, but this stamper handles that very well. 


Great so far - I'm very impressed by the polish, the stamper and the quality of the plate. I was a bit too hasty putting topcoat over my design and ended up with micro-streaks that show up in the pictures (but didn't in real life). 

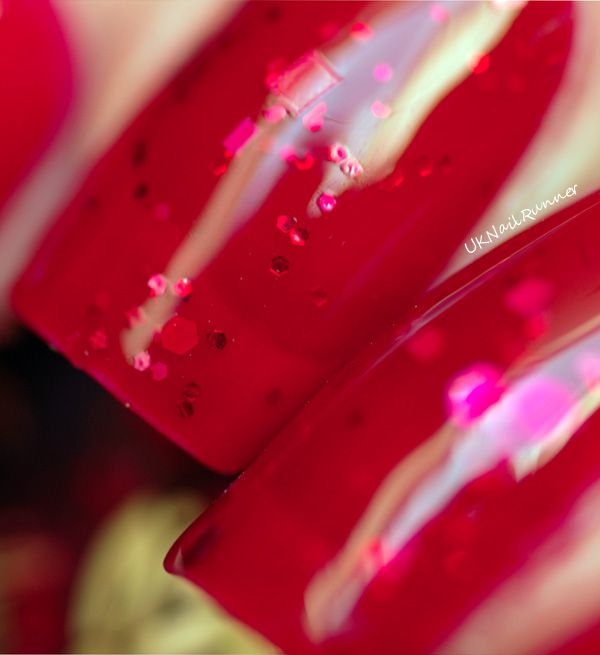
The second plate was 105, a selection of individual heart images. I decided to test these out over a textured polish (Binky London Crystal Pink) and create a skittle design. My favourite image on the plate is the grafitti style heart in the middle; I used this on my index finger for a full image, off centre on my ring finger and multiple times on my middle finger to create a random whole nail graffiti pattern. Then I chose a different heart for my little finger. I love how this turned out and the application of the stamped images to the textured polish was a breeze.  


So I'm giving a big thumbs up for the stamper, the plastic scraper is fine (although I always find an old plastic card perfectly adequate for this job) and comes as a bundle with the stamper anyway, the plates are good quality and stamp very well (and gave me the chance to try designs I'd probably not have chosen otherwise, as I tend to always go for full nail images) and the white stamping polish seems great.... before I decide if I want to make it my default white stamping and nail art polish I wanted to try a couple of other things though... 

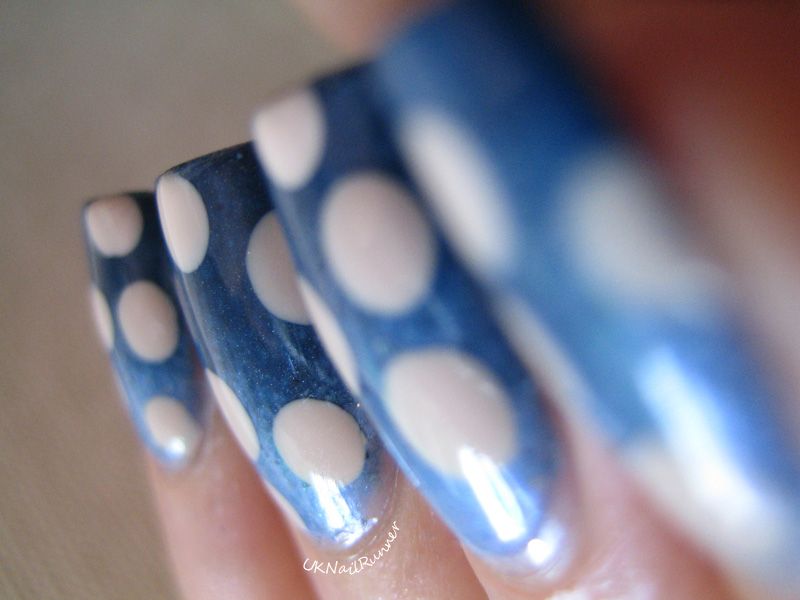
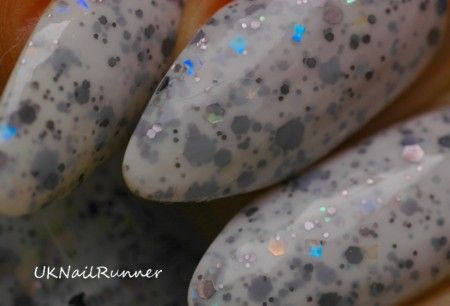
Full nail stamped design with a plate from my collection - the polish handled perfectly! I wanted a soft effect for this mani, so it has a layer of white jelly (Sally Hansen Polar Bare) over the stamping. The grey is Barry M Gelly in Almond.


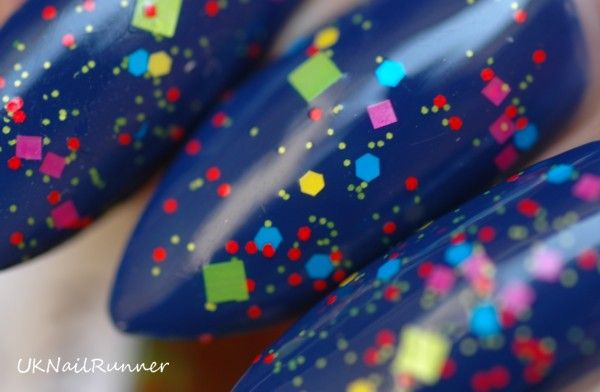
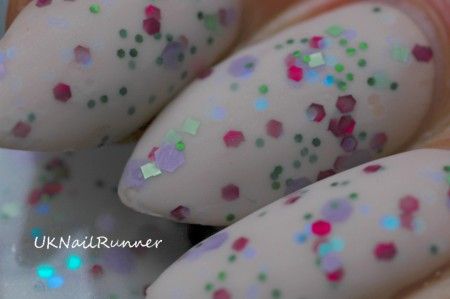
And lastly - is it opaque enough for dots?  I think so - these dots over a dark chocolate brown (Megan Miller Ganache) certainly pass muster by my standards. So I'd definitely recommend MoYou's white polish for stamping and other nail art!


 The MoYou products (Stamper and Scraper, White Special Stamping Polish and image plates 105 and 106) in this post were provided for honest review.These are all available to purchase at the MoYou website. The Binky London textured polish was a review sample (see this post for my review of this polish). Everything else I used in these designs is from my own collection and was purchased by me.


Monday, 28 July 2014

Binky London Crystal Pink and Enchanted Green - swatch and review

Binky London Crystal Pink

Binky London Enchanted Green

I have two new shades from Binky London; this brand launched at the end of last year with some great classic shades I reviewed here, here and here. I was really impressed with the formula of the first polishes, and the shape of the brush, which makes application super-easy, so I was excited to receive new colours from the brand to try out.

Let's start with Pink Crystal. This is a rose pink texture glitter, easy to apply and super pretty.

Binky London Crystal Pink

I used just two coats for this mani, no basecoat (and no topcoat, but I don't need to say that!) so really quick to do. Although it's textured, the polish isn't too thick, so it's quite easy to handle, and the big, round ended brush makes it easy to get a neat edge. I didn't do any kind of clean up for this mani! I would say that some people might find the big brush a bit unusual at first, especially with the textured polish, but do persevere because the results are well worth it once you get used to it.

Binky London Crystal Pink

Binky London Crystal Pink

Binky London Crystal Pink

The polish also makes a great base for stamping! Here's a preview of a new stamping polish I've been trying, with Binky Crystal Pink as the base:

Binky London Crystal Pink
Binky London Crystal Pink with stamping

More info on the MoYou stamping polish in my next post!

The other Binky polish I was sent to review is a fabulous bright emerald creme, Enchanted Green. My pictures just don't capture how stunning this colour is, but I absolutely loved wearing this. The formula surprised me though - based on the Binky polishes I've reviewed already I was expecting this to be smooth and easy to apply, but it wasn't. It was thick and a bit sticky, and made worse by the big brush, which seemed make it go on rather streaky. At two coats it looked lumpy, but trusty Seche Vite topcoat smoothed it out a treat and I like the colour so much I can forgive a slightly tricky application. It was a hot day when I used this polish; that might have affected the consistency too. 

Binky London Enchanted Green

Binky London Enchanted Green
 This is two coats with Seche Vite Quick Dry topcooat.

Binky London Enchanted Green

Binky London Enchanted Green

Products in this post were provided for review. Binky London polishes are available from Retail Beauty.

Friday, 1 November 2013

Tape design nail art with Barry M Countess


Barry M Countess
Barry M Countess


If you're in the UK and you haven't bought Barry M Countess yet............ you ought to! This is my favourite textured glitter polish to date! I've already shown it shiny with topcoat and a glitter topper (Femme Fatale Hydraxia) but I wanted to use it in a nail art design to showcase it's texture, rather than just wearing it as a straightforward mani.

I applied a vampy base (Nicole by OPI Smile For The Glam-era, although I probably have half a dozen *similar* colours that would work equally well), topped it off with Seche Vite to get maximum shine then applied striping tape in a random pattern. I added a single, thickish coat of Countess and removed the tape before Countess dried. I worked on just one nail at a time here - I found I got the best edges on the textured polish by removing the tape as quickly as possible. The effect is subtle, but definitely noticeable - I got several real-life complements when I wore this! However, I  might like to repeat this mani with either a very light base, perhaps a creamy nude or off-white, or a bright colour for a variation on the theme.

Barry M Countess

Barry M Countess

Barry M Countess


Barry M Countess
Barry M Countess

Here's a macro in full sun - the texture of Countess looks like sugar crystals <3

Barry M Countess
Barry M Countess

I purchased Barry M Countess from my local Boots.

Sunday, 13 October 2013

Gradient and dots with Barry M new autumn texture polishes (Matte Polish in Vanilla and Caramel and Royal Textured Glitter in Lady)

Barry M Matte Vanilla and Caramel gradient with dots in Lady
Barry M Matte Vanilla and Caramel gradient with dots in Lady 
I love matte polishes, so of course I was ready and waiting for the new autumn matte colours from Barry M. I have most of the Manglaze colours and the OPI Suedes, including a red, a couple of browns and a black, so the obvious choices for me were the two lighter, nude shades - Caramel (warm nude) and Vanilla (taupe / grurple). I'm kind of coming round to 'liquid sand' style textured glitters (I loved the ones from GOSH I wore in this post here) so I bought two shades from the new Royal Textured Glitters at the same time!

This whole mani is inspired by some colour mixing a kid I was working with did the other day - creamy light beiges looking all frothy and milky like a mocha latte :) To be honest I couldn't decide which of the two mattes to try first; I love nude shades of all tones, but as I held the bottles together they called out *gradient* so here it is. Subtle, because the colours are quite close, but I really like the effect. I used one coat of Vanilla, then sponged on the gradient of the two shades. I painted the polishes directly onto a fine, damp makeup sponge. The polishes seem quite thick, but application was easy. Great for gradients too, the colours blend perfectly. I'd say these are as good for gradients as the Barry M Gelly polishes, which are just awesome for gradients (and nail art in general).

I wore the gradient alone for a day, but I never got a chance to take photographs. Then I added large dots with Lady. I was trying to create a pastel version of this vampy matte gradient with dots I did a few weeks ago. I've never tried dots with glitter before, but this worked out just fine. Lady is a lovely polish, there's lots of iridescent complexity in here. I need to wear Lady on her own soon.


Barry M Matte Vanilla and Caramel gradient with dots in Lady

Barry M Matte Vanilla and Caramel gradient with dots in Lady


Barry M Matte Vanilla and Caramel gradient with dots in Lady

I'd describe the finish on the Barry M Matte polishes as smooth and waxy, compared to my other matte polishes. Manglazes all have a slight shimmer and the finish has a 'drier' sort of feel to it than these and OPI Suedes are sort of velvety-metallic - so this is a new and unique finish (in my collection anyway). My finish on the matte base might be a bit more textured because of the sponge application too.

A couple of macros:

Barry M Matte Vanilla and Caramel gradient with dots in Lady

Barry M Matte Vanilla and Caramel gradient with dots in Lady
Barry M Matte Vanilla and Caramel gradient with dots in Lady 


I'm not usually one for slopping topcoat over polishes that are intended to be matte or textured, but for some reason I wanted to see how Lady looked shiny - so I did! Actually I love the shiny version too!

Barry M Matte Vanilla and Caramel gradient with dots in Lady

Barry M Matte Vanilla and Caramel gradient with dots in Lady

Barry M Matte Vanilla and Caramel gradient with dots in Lady

Barry M Matte Vanilla and Caramel gradient with dots in Lady

Barry M Matte Vanilla and Caramel gradient with dots in Lady

Barry M Matte Vanilla and Caramel gradient with dots in Lady

Barry M Matte Vanilla and Caramel gradient with dots in Lady
Barry M Matte Vanilla and Caramel gradient with dots in Lady 

These are super polishes and just from this mani I'd say they are quite versatile. However, take a look at Debbie Crumpet's Q&A post about these to see what else you can do with them............ I want to try stamping next, and I want to buy more matte colours (the red and rusty brown - I already got my other pick of the Royal Glitters, Countess, although I've not worn her yet). Hmm!

I purchased my Barry M Matte in Vanilla and Caramel and Royal Glitter Texture in Lady from my local Boots.

Saturday, 21 September 2013

Gosh Frosted Sand - Silver & Purple

GOSH Frosted Silver and Frosted Purple

I'm not sure about textured polishes, so I've held off buying any of the OPI Liquid Sands, since none of the colours yet have really called to me, but when I saw these 'Frosted Sands' shades from GOSH in Superdrug the other day I couldn't resist. Especially as they were buy one get one for half price - so I bought two! There are just three colours in the range, Frosted Silver, Frosted Gold and Frosted Purple. Frosted Purple is actually a very pretty lavendery-gunmetal. I really don't get along with gold nail polish at all, so the choice of two from the three colours was very easy for me!

I decided to try them together as a gradient; I applied one coat of Frosted Purple, then added the gradient with the two colours painted directly on a damp make-up sponge. I went over the gradient twice to get a good density of colour, but even so the mani was very quick and easy to apply. And the two colours are made for each other!

GOSH Frosted Silver and Frosted Purple

GOSH Frosted Silver and Frosted Purple

GOSH Frosted Silver and Frosted Purple

GOSH Frosted Silver and Frosted Purple

Here are a few macro shots to show the texture a bit better.  I really like how the texture worked out on the mani; I'm not sure if it would be quite so good if I'd just brushed the polish on but the sponge application technique isn't a lot of extra effort even if you're only wearing a single colour, so I'll probably sponge the last coat if I wear either of these colours alone in future.  I'll certainly be checking out the GOSH stand again to see if they release any other textured colours; I like these a lot!


GOSH Frosted Silver and Frosted Purple

GOSH Frosted Silver and Frosted Purple

GOSH Frosted Silver and Frosted Purple

I purchased GOSH Frosted Silver and Frosted Purple from my local Superdrug last week.