Gallery

  • Emily de Molly

    No Love Lost
  • High Elbow

    Crummock Water
  • Dots!

  • Pocket Money Polishes - I Want Candy

  • Pocket Money Polishes Magic

    Gradient: Chanel Paradoxal and Dior Waterlily
  • Emily de Molly - Serenity

  • Fellrunning

    Dryburn Moor
  • Elevation Polish - Opal

  • Darling Diva Polish - Serendipity

  • Derwentwater

  • Pocket Money Polishes - Summertime

  • Nail Lacquer UK

    Eat My Cake
  • Scofflaw - Whiskey Tango Foxtrot

  • Hodge

  • Chanel - Taboo and Peridot

  • Chanel - Bel-Argus and Azure


Friday 28 February 2014

Flash Nails Jagged

Flash Nails Jagged over Illamasqua Jo'mina and NARS 15 Minutes

I've been sad to see a few of the UK Indie brands (including some of my favourites) shutting up shop recently, so it's great to see new ones coming in to the market! Here's a brand new UK Indie, Flash Nails, who just opened her Etsy shop last week.

This polish is called 'Jagged' and it's a mix of multicoloured shard glitter. I have a fascination with the irregular shapes in shard glitter polishes, so I love this!

Flash Nails Jagged over Illamasqua Jo'mina and NARS 15 Minutes

Flash Nails Jagged over Illamasqua Jo'mina and NARS 15 Minutes


I used two thin coats of Flash Nails Jagged here; the polish is easy to apply with plenty of glitter - no need to fish them out or do any special placement on the nails. The base of the polish is quite thick, but easy to handle. I found the glitters lay nice and flat on my nails; I added one coat of Gelous to smooth the mani out and a coat of Seche Vite quick drying top coat.

The gradient base is NARS 15 Minutes and Illamasqua Jo'Mina, a couple of favourite spring bright shades of mine.


Flash Nails Jagged over Illamasqua Jo'mina and NARS 15 Minutes

Flash Nails Jagged over Illamasqua Jo'mina and NARS 15 Minutes


Flash Nails Jagged over Illamasqua Jo'mina and NARS 15 Minutes

Flash Nails Jagged over Illamasqua Jo'mina and NARS 15 Minutes

I purchased Jagged from Flash Nails Etsy Shop. Actually I purchased more than one; there are lots of pretty glitters here - so watch out for more from this brand here soon. The NARS and Illamasqua polishes are old favourites from my collection.

Wednesday 26 February 2014

Shell stamping - MoYou Sailor plate 7


Ilamasqua Nomad stamped with MoYou Sailor plate 7


Here's a pretty all over shell image from MoYou Sailor Collection plate 7. I really liked how this turned out, for a skinny design, the stamp worked really well. I continue to be impressed with MoYou plates. There's another nice shell pattern on this plate, one with fish that I like the look of, and several interesting swirly designs too. 

I stamped the design with Sally Hansen Whirlwind White over a base of Illamasqua Nomad. 

Ilamasqua Nomad stamped with MoYou Sailor plate 7

Ilamasqua Nomad stamped with MoYou Sailor plate 7

Ilamasqua Nomad stamped with MoYou Sailor plate 7

All products in this post purchased by me. 

Sunday 23 February 2014

New nail shape and some native american inspired stamping.......

MoYou Explorer Collection Plate 14
I filed my nails into baby stilettos! This happens every year about this time. Or at least for the last three years, I can't remember exact dates of nail shape changes before then, I just used to paint my nails a couple of times a week - there were no pictures, lol! I get bored with square nails, so I shape them pointy. Then I grow them long. Then I get bored with them, so I cut them short and square again. The last bit usually happens in the summer when I'm swimming outside a lot, and it takes ages to get into my wetsuit AND I start shredding it!


The mani is a base of American Apparel Cotton, stamped with Barry M Matte Nail Paint in Caramel. I used two different sections from MoYou Explorer Plate 14 for this part of the stamping.

MoYou Explorer Collection Plate 14


MoYou Explorer Collection Plate 14

MoYou Explorer Collection Plate 14

I wasn't specially concerned to get the two parts of the image equally spaced, since I was just going to stamp another pattern band over the blank bit. I did like how these pale neutral colours looked together though, so I thought it was worth taking a picture.

Then I added a black band from another part of the plate with American Apparel Hassid. I love how this mani turned out - I'm becoming increasingly fond of MoYou plates and my collection is growing steadily, lol. I'm a great fan of ethnic geometric patterns, so the explorer collection really hits my spot! And I like the whole pattern plates, they give such a variety of pattern possibilities.

MoYou Explorer Collection Plate 14

MoYou Explorer Collection Plate 14

MoYou Explorer Collection Plate 14

MoYou Explorer Collection Plate 14

Saturday 22 February 2014

Nails Supreme Nail Art Pens

Nails Supreme Nail Art Pens


I've seen a few posts about these pens recently so I was quite excited when I was asked to review them as well! The nail art pens come in two sets of ten colours, and are double-ended, with one colour at each end of the pen.

One set is cream colours, plus silver and gold, and the other set is shimmer shades. There's a good range of colours across the two sets, although if I had to choose just one pack I'd go for the creams set since this includes black and white which are SO useful in nail art!

Nails Supreme Nail Art Pens
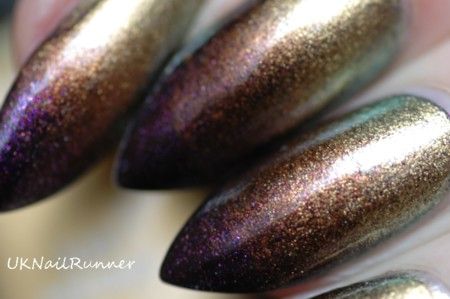
Nails Supreme Nail Art Pens - 'Cream' set

Nails Supreme Nail Art Pens
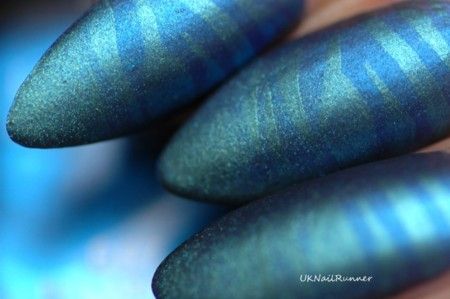
Nails Supreme Nail Art Pens - 'Shimmer' set

The pens actually consist of two 4.8ml bottles of polish screwed together - you can take them apart, reassemble them in different pairs if you wanted to take them travelling, or just use the single bottle if that fits in your hand more easily. Here's a single bottle:

Nails Supreme Nail Art Pens

Pull off the cap and you have a fine metal nib, rather like a technical drawing pen, which is great for fine lines, details and tiny dots!

Nails Supreme Nail Art Pens

Nails Supreme Nail Art Pens

Nails Supreme Nail Art Pens

The bottle itself is a softish plastic, made so you can gently squeeze to get the colour flowing through the nib. I found these fairly easy to use and control - I just needed to be a bit careful not to squeeze too hard or hold the nib vertical for too long or a big blob of polish would appear on the end. The pack includes a cleaning tool 

As well as the nib, there is also a brush - revealed by unscrewing the whole of the cap:

Nails Supreme Nail Art Pens

So you could use these as a basic polish if you felt so inclined (or remove polish to use with other nail art tools). Personally, I would have preferred if they had included a thin striper brush rather than a regular polish brush, as the pens are intended for nail art rather than everyday polishing. I'm not sure about the quality of the polish itself; it doesn't say anywhere on the packaging where the product is made or if it is 3-free. Some of the colours smell quite strong too when you open the bottle to use the brush. However, I'm not too concerned about the quality of the polish given that I'm only going to be using tiny quantities of it through the nail art nibs. 

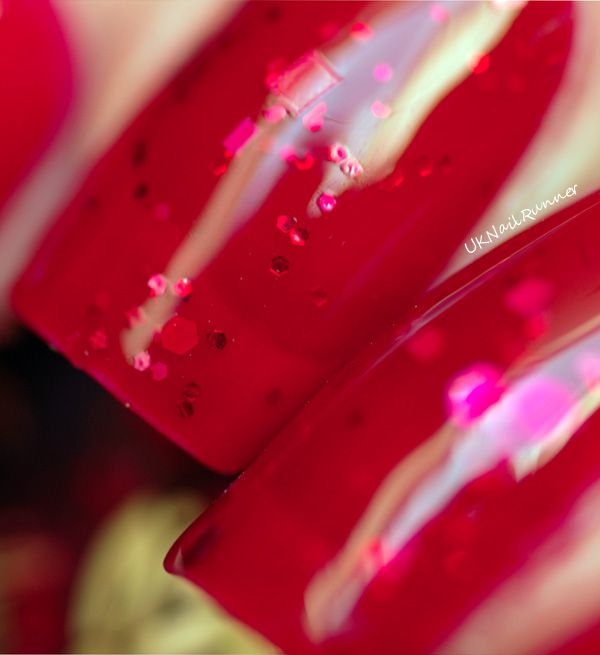
I experimented with the pens to create a freehand paisley-meets-nudibranch design. I'm fascinated by nudibranchs - they're tiny marine invertebrates but they have the most fabulous patterns and colours. It's hard to believe some of them are real. Here's a link to a whole page of them - every one could be an inspiration for a mani!

Here's my mani anyway:

Nails Supreme Nail Art Pens

Nails Supreme Nail Art Pens

Nails Supreme Nail Art Pens

I drew on some curvy shapes with the orange shimmer pen, then added some curves in white and finally some tiny white dots. I found the pens easy to use and didn't have any problems with the flow of polish - not too much or too little. The dots are smaller than I could achieve with a dotting tool - I'm sure I'll be using these pens quite a bit for micro-dots in the future!

One thing to watch though, is to allow plenty of time for the polish to dry before adding topcoat. When you apply polish in nail art like this, it usually ends up much thicker than in a normal application, and you're not applying coats and letting each dry before you add the next either. So it needs a good amount of drying time or the topcoat will drag and smear the design and spoil it. If you can, the best thing to do would be to do your design in the evening, and let it dry overnight before topcoating in the morning!

Another tip that I use with all nail art - always make sure that you've got a thickish covering of topcoat over your base before you start, and that the topcoat is fully dry. Two reasons I like to do this - firstly, if I mess up with the nail art (or I just don't like how it turns out) I can easily remove it without affecting the base so I can have another go; and secondly, when I apply topcoat over my design, the topcoat can't make the base colour bleed into the design. I still remember a complex, squiggly white design I did over red three or four years ago - it took ages, and I was so pleased with it. Then I added topcoat and the red base polish bled into the white and made a horrible pink mushy mess. I've never done nail art without adding topcoat over my base colour since!

Nails Supreme Nail Art Pens


One final thing I think these pens could be really useful for - correcting mistakes (or blank spots) when stamping. I really enjoy stamping, and stamped designs, but there are often bits of the image that don't come out quite perfect, however careful you are. Also, I like my nails long sometimes, and the image plates aren't always long enough, so I end up freehanding in the missing bits with a fine brush or a nail art pen....... but the only nail art pens I already have are a black one and a white one and these have much thicker tips than these - so I see a great application for these pens here, for me at least.

Here's a stamped mani I've just done, picture isn't great because it's just a tiny detail cut from a bigger image, but the black didn't quite stamp perfectly... I tidied it up with my black Nails Supreme pen and that really saved the day!


These pens were sent for review; they are available to purchase from Presents for Men (seems a bit of strange thing for a retailer with a name like that to be selling, but, whatever). They are priced £19.99 for each pack of 10 colours - which seems pretty reasonable when you work out that it's only £2 a shade. The other thing that the very resourceful Vic at Glowstars has worked out is that the pens can be taken apart for cleaning or refilling - so even when the polish has gone there is still a useful nail art tool than can be used over and over! 

Friday 21 February 2014

Gradient with Mentality Duchess and Manglaze Lesbihonest


Mentality Duchess and Manglaze Lesbihonest

Just a bit of fun today! I love pinks......and gradients, and mattes............ so here's a combination of a lovely new pink matte I bought recently (Mentality Duchess) and an old favourite (Manglaze Lesbihonest). I love how this worked out - and it's great to know that the Mentality Mattes (which I've just discovered recently) work well in gradients with my collection of Manglaze shades.


Mentality Duchess and Manglaze Lesbihonest
To create the effect I used one coat of Duchess all over my nails, then added the gradient using both colours painted onto a slightly damp makeup sponge. I like matte gradients - matte polishes seem to blend nicely together and the sponging gives a nice finish too.

Mentality Duchess and Manglaze Lesbihonest
I purchased Mentality Duchess from Sally Magpies and Manglaze Lesbihonest is an old favourite from my collection. Manglaze polishes used to be a bit tricky to get hold of in the UK but Sally started stocking this brand too recently - which great news for UK matte polish fans.

Sunday 16 February 2014

Quirk Oopsie Daisy - Thermal #2

Quirk Oopsie Daisy Thermal


Kerrie at Quirk put a few of her trial and experimental bottles up for sale this week, and since I've been super-impressed with every polish she's sent me for review, I decided to show her some support and buy some of the one-offs. Here's the first one - this certainly does not disappoint!

I've resisted the thermal craze so far (although I'm constantly tempted); I keep telling myself that I don't want these / they won't work for me because:

  • I've read that the thermal pigments stop working after a while
  • I can do a perfectly acceptable gradient
  • I have poor circulation in my fingers so they'll just be the 'cold' colour all the time
But here we are, I've given and I love this! The polish is bright leaf green in the bottle (and in it's 'cold' state) - a super colour I'd wear over and over again regardless of any fancy effects. Here it is cold:

Quirk Oopsie Daisy Thermal

Quirk Oopsie Daisy Thermal
Quirk Oopsie Daisy Thermal - cold

It is quite sheer, and dries to a satiny finish like a neon - maybe this is because of the colour or perhaps it's common to thermal pigments.  I used four thin coats plus Seche Vite to add a shine - not a problem for me and I really like the juicy, squishy finish. 

Quirk Oopsie Daisy Thermal
Quirk Oopsie Daisy Thermal - hot

This is 'hot' I noticed how the heat from my hairdryer turned the polish acid yellow as I was drying my hair, so I gave by hand another quick blast before I took this picture! This one is in very strong light by the window and you can see the VNL. I don't mind this though. And then as my fingers are starting to cool down bit - you can see the tips starting to become a slightly darker green....

Quirk Oopsie Daisy Thermal


Now lets have some full on thermal shots! They went yellow whilst I was in the shower, then stayed like this for a good long while afterwards before turning fully green. To be fair, it is pretty cold here!

Quirk Oopsie Daisy Thermal

Quirk Oopsie Daisy Thermal

Quirk Oopsie Daisy Thermal

Quirk Oopsie Daisy Thermal

Quirk Oopsie Daisy Thermal

I purchased this polish from the Quirk webshop - this was a one-off but I'm really hoping Kerrie will introduce some thermal shades into her collection soon. You can keep up with Quirk news at the Quirk Facebook Page.

Friday 14 February 2014

Valentines mani - including reviews of Models Own Hypergels and FakeTattoos nail tattoos

Models Own Hypergel Pink Veneer and Cerise Shine with FakeTattoos heart nail tattoo


Models Own Hypergel Pink Veneer and Cerise Shine with FakeTattoos heart nail tattoo


Pink and hearts for Valentines Day, how predictable! I wasn't really planning this, but a review pack of Models Own Hypergel Polishes landed on my doorstep yesterday, including two super pinks......... so why not!

And, at last, it gives me something I can post in Missy's Nail Art A Go Go challenge......... HEARTS!!!


I started the mani out with a sort of ombre using Models Own Pink Veneer (the sugary baby pink) on my index finger, a gradient of Pink Veneer and Cerise Shine (a fab hot pink - one of my favourite nail shades) on my middle finger and Cerise shine alone on my ring finger. I painted my little finger black - there isn't a black in the Models Own Hypergel range but I had something specific in mind for my mani that needed a black nail.

Here's the ombre before I started adding the hearts and dots:

Models Own Hypergel Pink Veneer and Cerise Shine


Application of the Hypergels is good - Cerise Shimmer is almost a one coater (I did two more out of habit than because I really needed to) and the consistency and flow was just about perfect. This is a polish I'm sure to use a lot in future. Pink Veneer is a little trickier, but you'd expect this with any pale pink like this. The first coat looked streaky, but it was fine after the second coat.

As you can see, the colours gradient together wonderfully - I painted one coat of Pink Veneer as a base, then applied the gradient with a fine, slightly dampened makeup sponge.

Models Own Hypergel Pink Veneer and Cerise Shine


Models Own Hypergel Pink Veneer and Cerise Shine

Models Own Hypergel Pink Veneer and Cerise Shine


For the nail art, I received a couple of packs of nail tattoos to try out from FakeTattoos, a company based in Sweden, last week. These included a sheet of hearts, mostly black but a few pink and other pastel colours. 


Models Own Hypergel Pink Veneer and Cerise Shine with FakeTattoos heart nail tattoo


I used four of the black heart tattoos on my ring finger nails and a single one on my index finger. The tattoos look pretty good once finished, but they are a bit fiddly to apply. You cut out the tattoo you want from the sheet - they have a plastic cover sheet on the front and paper backing. Once you have the tattoo cut out, peel off the plastic and stick the tattoo, sticky side down onto your nail. Then you need to hold a pad of damp paper (I used cotton wool actually) over the paper to soak it, until the paper slides away. Wait a few minutes for the tatto to dry, then apply top coat. They had a bit of an edge around them, so I used a coat of Gelous to smooth the nails out before adding Seche Vite. 

I had intended to use the light pink tattoos on my black nail, but unfortunately these didn't show up at all on the black - I guess they must be transparent; probably would be good over white or a very pale background shade. 

So I decided on dots instead - I wanted to see how the Hypergel shades stood up as dots over black - and they do so very well! I think these two Hypergel shades have lots of potential for nail art!


Models Own Hypergel Pink Veneer and Cerise Shine with FakeTattoos heart nail tattoo

Models Own Hypergel Pink Veneer and Cerise Shine with FakeTattoos heart nail tattoo


Models Own Hypergel Pink Veneer and Cerise Shine with FakeTattoos heart nail tattoo


The FakeTattoos pack said the products were also suitable for application to the skin, so I added a heart to the outside of my little finger. It looked convincing last night, but it had mostly rubbed off by mid morning...... maybe they would last longer on a less exposed part of the body!


Models Own Hypergel Pink Veneer and Cerise Shine with FakeTattoos heart nail tattoo

I did the same gradient on my thumb as on my middle finger, and added a freehand heart in Cerise Shine near my cuticle with a dotting tool. then dotted over the heart with Pink Veneer. This was easy to do and I like the way it turned out!


And finally, a close up of a couple of the nails

Models Own Hypergel Pink Veneer and Cerise Shine with FakeTattoos heart nail tattoo


Models Own Hypergels are available on their website now and will be in Boots and Superdrug later this month. The colours used here were sent for review. You can buy FakeTattoos nail tattoos at their website here (they also have some interesting looking bigger fake body tattoos).