 |
| Nails Supreme Nail Art Pens |
I've seen a few posts about these pens recently so I was quite excited when I was asked to review them as well! The nail art pens come in two sets of ten colours, and are double-ended, with one colour at each end of the pen.
One set is cream colours, plus silver and gold, and the other set is shimmer shades. There's a good range of colours across the two sets, although if I had to choose just one pack I'd go for the creams set since this includes black and white which are SO useful in nail art!
 |
| Nails Supreme Nail Art Pens - 'Cream' set |
 |
| Nails Supreme Nail Art Pens - 'Shimmer' set |
The pens actually consist of two 4.8ml bottles of polish screwed together - you can take them apart, reassemble them in different pairs if you wanted to take them travelling, or just use the single bottle if that fits in your hand more easily. Here's a single bottle:
Pull off the cap and you have a fine metal nib, rather like a technical drawing pen, which is great for fine lines, details and tiny dots!
The bottle itself is a softish plastic, made so you can gently squeeze to get the colour flowing through the nib. I found these fairly easy to use and control - I just needed to be a bit careful not to squeeze too hard or hold the nib vertical for too long or a big blob of polish would appear on the end. The pack includes a cleaning tool
As well as the nib, there is also a brush - revealed by unscrewing the whole of the cap:
So you could use these as a basic polish if you felt so inclined (or remove polish to use with other nail art tools). Personally, I would have preferred if they had included a thin striper brush rather than a regular polish brush, as the pens are intended for nail art rather than everyday polishing. I'm not sure about the quality of the polish itself; it doesn't say anywhere on the packaging where the product is made or if it is 3-free. Some of the colours smell quite strong too when you open the bottle to use the brush. However, I'm not too concerned about the quality of the polish given that I'm only going to be using tiny quantities of it through the nail art nibs.
I experimented with the pens to create a freehand paisley-meets-nudibranch design. I'm fascinated by nudibranchs - they're tiny marine invertebrates but they have the most fabulous patterns and colours. It's hard to believe some of them are real. Here's a link to a whole page of them - every one could be an inspiration for a mani!
Here's my mani anyway:
I drew on some curvy shapes with the orange shimmer pen, then added some curves in white and finally some tiny white dots. I found the pens easy to use and didn't have any problems with the flow of polish - not too much or too little. The dots are smaller than I could achieve with a dotting tool - I'm sure I'll be using these pens quite a bit for micro-dots in the future!
One thing to watch though, is to allow plenty of time for the polish to dry before adding topcoat. When you apply polish in nail art like this, it usually ends up much thicker than in a normal application, and you're not applying coats and letting each dry before you add the next either. So it needs a good amount of drying time or the topcoat will drag and smear the design and spoil it. If you can, the best thing to do would be to do your design in the evening, and let it dry overnight before topcoating in the morning!
Another tip that I use with all nail art - always make sure that you've got a thickish covering of topcoat over your base before you start, and that the topcoat is fully dry. Two reasons I like to do this - firstly, if I mess up with the nail art (or I just don't like how it turns out) I can easily remove it without affecting the base so I can have another go; and secondly, when I apply topcoat over my design, the topcoat can't make the base colour bleed into the design. I still remember a complex, squiggly white design I did over red three or four years ago - it took ages, and I was so pleased with it. Then I added topcoat and the red base polish bled into the white and made a horrible pink mushy mess. I've never done nail art without adding topcoat over my base colour since!
One final thing I think these pens could be really useful for - correcting mistakes (or blank spots) when stamping. I really enjoy stamping, and stamped designs, but there are often bits of the image that don't come out quite perfect, however careful you are. Also, I like my nails long sometimes, and the image plates aren't always long enough, so I end up freehanding in the missing bits with a fine brush or a nail art pen....... but the only nail art pens I already have are a black one and a white one and these have much thicker tips than these - so I see a great application for these pens here, for me at least.
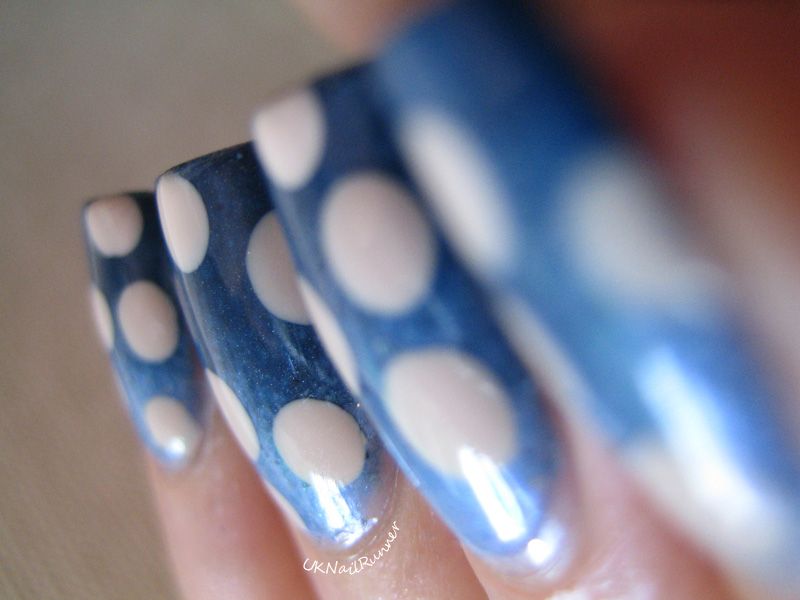
Here's a stamped mani I've just done, picture isn't great because it's just a tiny detail cut from a bigger image, but the black didn't quite stamp perfectly... I tidied it up with my black Nails Supreme pen and that really saved the day!
These pens were sent for review; they are available to purchase from Presents for Men (seems a bit of strange thing for a retailer with a name like that to be selling, but, whatever). They are priced £19.99 for each pack of 10 colours - which seems pretty reasonable when you work out that it's only £2 a shade. The other thing that the very resourceful Vic at Glowstars has worked out is that the pens can be taken apart for cleaning or refilling - so even when the polish has gone there is still a useful nail art tool than can be used over and over!




No comments:
Post a Comment
I love to receive comments on my posts and always read them :)